
Hi Girls,
Cathy here today
It's a bit of a long post from me for this week as I have a LO, 2 cards and tutorials to share so bear with me. This week My2Angels is focusing on using ribbons and lace and we are showing you techniques on how to incorporate them on your own creations.

First up is my Ribbon LO.
I started with Kraft Cardstock (which is only 75 cents at Tracy's store.. bargain!!) for my background and then used the yummy Websters Yacht Club Diecut and other pp's from the Yacht Club range which I hand cut and layered with foam tape.
Websters pp's are just perfect for fussy cutting and are one of my fav ranges for this technique.
I added some textures to my LO by using some of this beautiful cream lace flower trim to frame my photo and some hessian.
The roses were made by rolling some ric rac... loved trying out this technique and you can have a go at making your own by following Tracy's tutorial which is further down this post .. so easy to make!!

Using ric rac is a great way to simulate waves and I used some beautiful blue velvet ric rac here, creating some lovely soft textures.

With all the charms Tracy has in store, you're bound to find the perfect embellishment for your LO's and I used two of them here. The Yacht charm which
I tied with some Bakers Twine and the gorgeous fish charm which is swimming in amongst my ric rac waves.
I decided to combine stickers and pp's for my title by hand cutting the gorgeous alphas from Websters using the Yacht Club Alpha Stickers.
I also hand cut the little white butterflies from the Websters Trendsetter Style 105 pp and finished off with one of Tracy's fab memories embellishment pins and some Jingle Bells glimmermist.
With my 1st card I decided to go masculine and used the Websters Yacht Club pp's again which I hand cut and layered and some Websters Seaside Retreat for the background.
For the ribbon detail on this card I scrunched the organza ribbon for some texture. I have added a simple tutorial for those of you who haven't tried this before.

How cute is this turtle charm.. like I said before Tracy has a charm for all your LO's.
Check out the COMING SOON section at my2angels as Tracy has some new charms which will be available within the week.
For my 2nd card I went bright and feminine using more Webster pp's in the Spring Market & Wonderfall ranges & some Basic Grey for the background. I hand cut & layered the papers and added some mini roses & a dragonfly charm for a little interest.
On the border of the card I layered some velvet ric rac and a border sticker from the Spring Market image and phrase sticker sheet. I changed the colour of my white organza ribbon with some Tim Holtz Mustard Seed Distress Ink to match my pp's and then pleated the ribbon for some texture.
For the sentiment I used the Spring Market alpha stickers.

I have put together 2 quick and easy tutorials on scrunching and pleating ribbon.
Scrunching Ribbon

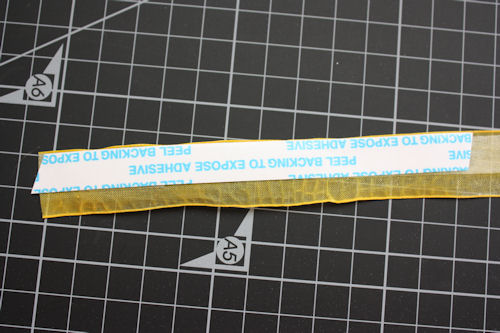
Start with sticking down some double sided tape where you would like your scrunched ribbon.


and scrunch the ribbon as you go.. if you want a messier look don't be too particular about how you scrunch it.

Pleating Ribbon
Pleating ribbon is a similar technique but instead of placing the adhesive tape on your project I adhere it to the back of the ribbon to be pleated.
You can just pull the backing off as you go, to make it easier, then pleat and stick down.
It will stick up, so you can use you sewing machine to stitch in place or place bits of tape under each pleat to for a nice flat finish.


Hope you enjoyed some the of the simple ways I incorporated ribbon onto my LO's and hope to see some of your ribbon inspired creations in our gallery.
Cheers
Cathy :)))

Here's a great way of making ribbon rosettes.
Take 1m of my2angels girlfriends ribbon , and gather it in loops with your sewing machine. I simply fold the ribbon as I go.
Sew only along the edge of the ribbon.
The smaller the loops the better it will look.


Cut a circle (about 4cm diameter) from sturdy cardstock. This does not have to be perfect as it won't be seen.

When you come to the middle leave a small empty space

Now you glue in a cabochon flower or an acrylic flower , daisy charm flower or a flower from a rhinestone chain .
Whatever takes your fancy.

This looks great on a hair pin or a head band too!

Finish the centre however you like and you're done in a flash.
This is also great for ribbon that won't sew easy, like the glitter ribbon I used.


Do a running stitch on three sides of the ribbon starting from the narrow side up along the long side and down the wider side and pull together to make one flower (figure 2) and sew together in the centre


Just added some bling to the centre of the flower and some loops of rhinestones to the
Glue the bud on with glossy accents (fantastic glue I use this on everything ... (Tracy uses Dimensional Magic for all her gluing but I love glossy accents so there are two choices for your gluing needs and they also are a glossy medium as well)

and from me, Tracy

Ribbon Rosettes
by Geli
Making ribbon rosettes (with a version for seamstresses and one for the sewing impaired)

Here's a great way of making ribbon rosettes.
Take 1m of my2angels girlfriends ribbon , and gather it in loops with your sewing machine. I simply fold the ribbon as I go.
Sew only along the edge of the ribbon.
The smaller the loops the better it will look.

Your ribbon is now only about 1/3 of the original length.

Cut a circle (about 4cm diameter) from sturdy cardstock. This does not have to be perfect as it won't be seen.
For the next step I have used a hot glue gun (cause I'm the impatient kind).
You can also use Pritt glue and hold down each section for a little while till it sticks. Starting from the outer edge, glue on sections of the gathered ribbon until you've come all the way around. Then you start overlapping the previous row. Like a snail. You get it.
You can also use Pritt glue and hold down each section for a little while till it sticks. Starting from the outer edge, glue on sections of the gathered ribbon until you've come all the way around. Then you start overlapping the previous row. Like a snail. You get it.

When you come to the middle leave a small empty space

Now you glue in a cabochon flower or an acrylic flower , daisy charm flower or a flower from a rhinestone chain .
Whatever takes your fancy.

This looks great on a hair pin or a head band too!
Are you a sewing impaired person?
Don't despair, here's a cheater's way (though it's not as sturdy). Stick some 6mm double sided tape along one edge of the ribbon and peel it off one bit at the time as you stick it on the cardboard circle.
Pinch it into loops as you go.
I used about 1/2m of ribbon.
Don't despair, here's a cheater's way (though it's not as sturdy). Stick some 6mm double sided tape along one edge of the ribbon and peel it off one bit at the time as you stick it on the cardboard circle.
Pinch it into loops as you go.
I used about 1/2m of ribbon.

Finish the centre however you like and you're done in a flash.
This is also great for ribbon that won't sew easy, like the glitter ribbon I used.

If you have mastered the art of pinching and sewing you can do all sorts of cool stuff, even sewing in the middle of the ribbon and using it as a groovy border.
Big loops will look good for boys, too.
Big loops will look good for boys, too.

Geli

Do a running stitch on three sides of the ribbon starting from the narrow side up along the long side and down the wider side and pull together to make one flower (figure 2) and sew together in the centre


Just added some bling to the centre of the flower and some loops of rhinestones to the
back of the flower. (and Tracy some has feathers now in store which will look great on these also)
I also make a black flowers with white acrylic rhinestone chain and a rosebud
Glue the bud on with glossy accents (fantastic glue I use this on everything ... (Tracy uses Dimensional Magic for all her gluing but I love glossy accents so there are two choices for your gluing needs and they also are a glossy medium as well)

Lindy
and from me, Tracy
with Ric Rac Flowers
What do you need:


What do you need:
Needle and thread to match your ric rac (or hot glue gun or any other quick drying glue suitable for ribbon)
Scissors

Take a piece of ric rac and fold over the end on an angle and secure with a couple of stitches
(this usually turns me off making flowers so I use my hot glue gun instead)
(this usually turns me off making flowers so I use my hot glue gun instead)

Start to roll your ric rac around your stitched end, stitching to secure as you go (or glue)


On each roll, pinch the bottom of ric rac and glue as you go, give the flower an open bloom look as opposed to closed flat bud
(I have rolled it loosely for the benefit of the photos)
(I have rolled it loosely for the benefit of the photos)
Keep rolling until you have the desired size of flower.
Cut ric rac and secure by gluing the end piece under your flower
then add to your layout as Cathy has done above


Wishing you all a fun and creative weekend
and just quickly before we go
with all the HUGE range of mediums out there, we have so many options to colour ric rac and ribbonS to suit your layouts (and give it some texture) ...
Here a few mediums I have played with on our ric rac to show you what it will take ...
(for the record Glimmer Mist also works perfectly but I ran out of time and sunshine to get photos)
(for the record Glimmer Mist also works perfectly but I ran out of time and sunshine to get photos)


Hope our mega long post gave you a few ideas (or reminders) of incorporating ribbon into your creations


No comments:
Post a Comment