Christmas Canvas Ideas
My Christmas Joy
by Wendy

I wanted something to put on my wall as a Christmas decoration so I came up with the idea of making a canvas/layout of my 2 boys using ornament shapes for the photos!
I started off with a 12x12 canvas which I painted with some red acrylic paint and after that was dry I painted on some silver acrylic paint sparingly and then rubbed most of it off just to give a hint of silver.

I made my LO using the gorgeous LYB Christmas Delight Papers, which are so easy to mix and match.
Using the LYB Christmas Morning-Gifts Galore for a base, I have then cut several strips of different papers to use across the middle of the paper, LYB Merry Bright Bands & Chestnut Carols and LYB Delightful Dots.
I have also cut out some gifts from LYB All Wrapped Up for layering with the other gifts across the bottom of the paper. The final strip is some Bazzil Kraft which I punched out using a lattice punch.

After layering the papers and adding the extra cut out gifts (some with 3d tape) I added a strip of my2angels Red Acrylic Chain with Rhinestones and inked up some Scrapware chipboard.
The word ‘JOY’, using the Antique Alphas and 4 Holly Photo Anchors.
 After inking, I gave them both a good coat of trusty Crackle Accent.
I also crackled the little bird and the rest of my title which is a diecut and some letter stickers from my stash.
Now the most important part, the photos, are stuck onto chipboard (MDF) ornaments which I had in my stash from last year! (another unfinished project!!!)
After sticking on the photos I cut out around the ornaments with my craft knife and then sanded the edges I am very happy with the finished look. I ‘tied’ them on my LO with some my2angels Gold Satin Ribbon with Gold Stars and stuck the holly on next to the photos with some red ‘berry’ brads!
Finally I used some Kindy Glitz, Perfect Pearls (mixed with some Mod Podge) and Liquid Pearls to decorate my gifts (think all that KG Corrina has been using on her cards has finally rubbed off on me lol!!!).
When my page was dry I stuck it on my painted canvas using double sided tape.
Thanks for looking!
Wendy
From Taryn
I was lucky enough to get my hands on some of the gorgeous Everybody Loves Christmas range by
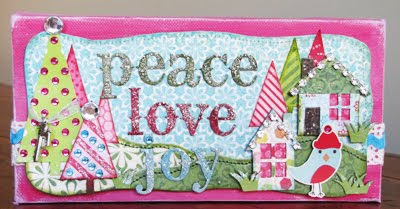
Echo Park, and made a cute little Christmas canvas...
If you want to have a go at making one of these yourself, here's a few tips on how I went about it.
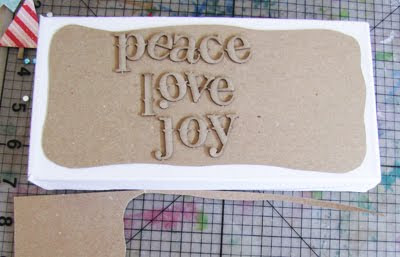
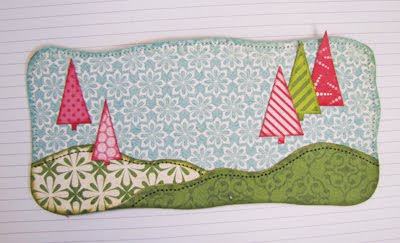
I started by cutting a random-shaped piece of card to fit just inside the edges of the canvas.
I covered it in the
Snowmen paper, and added a few green hills, along with some Christmas
trees I cut from the
Trim the Tree paper. I highlighted the edges with some
distress ink, and some stitching, and then gave the entire thing in modge podge before mounting it onto my painted canvas using
3d foam tape.
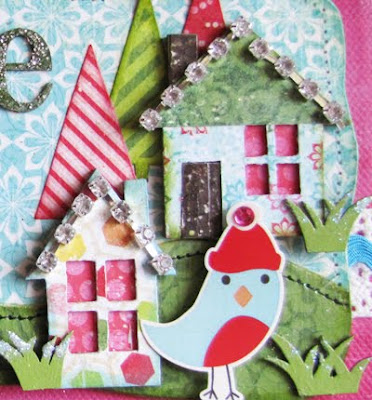

Hope you can use a few of these techniques on your next project, and even better still, hope you get to try the Everybody Loves Christmas range.
It is so bright and cheerful, perfect for our summery Christmas
Taryn
And lastly, from me Tracy
I just love the new paper range from
The Girls Paperie , nice thick papers ... perfect to tear and distress. And the colours ... are my favourite and match so many of my photos kind of Pink / Raspberry and Green and since my top in this photo was so dominant well ... I had no choice but to use it ah?
This is my favourite photo to date of my angels and I taken back in August which is my Christmas present to myself and now sits on my computer desk. Whoops I mean when I open it up on Christmas morning it will go on my computer desk PML

I covered the canvas with
Tinsel & Twig Deck the Halls pattern paper and
black inked the edges
The scrapware
Chipboard Flourish Arch was painted black then I heat embossed it with
Metallic Silver and wiped it off which still hot, exposing some of the black base
Jut behind the flourish piece I cut up a section from the
Tinsel & Twig paper - one side of this paper is a patchwork of patterns from the range. I choose the tiny rose blooms patchwork (they are so pretty and dainty)
Each of these papers on the border (you know the piece we usually cut off, has a small section from another contrasting pattern paper, so using the rose blooms piece I mounted this with
foam tape to created a window sill
I covered the photo with acetate then adhered to the canvas

As it was around 5ish when creating this - it was wine time so I broke a branch off a tree from out the back, sat down with a wine enjoyed the sunshine and painted the branch black - it doesn't take long ... in fact I only just finished the glass ;)
See ... scrapbooking is a stress reliever LOL it might cost us lots but then so does a medical professional!


.jpg)


 I also chose a
  The
The 




 Posts
Posts


.jpg)
