Showing posts with label Charmed Life. Show all posts

Sunday, October 5, 2014

Cards with Charmed Life

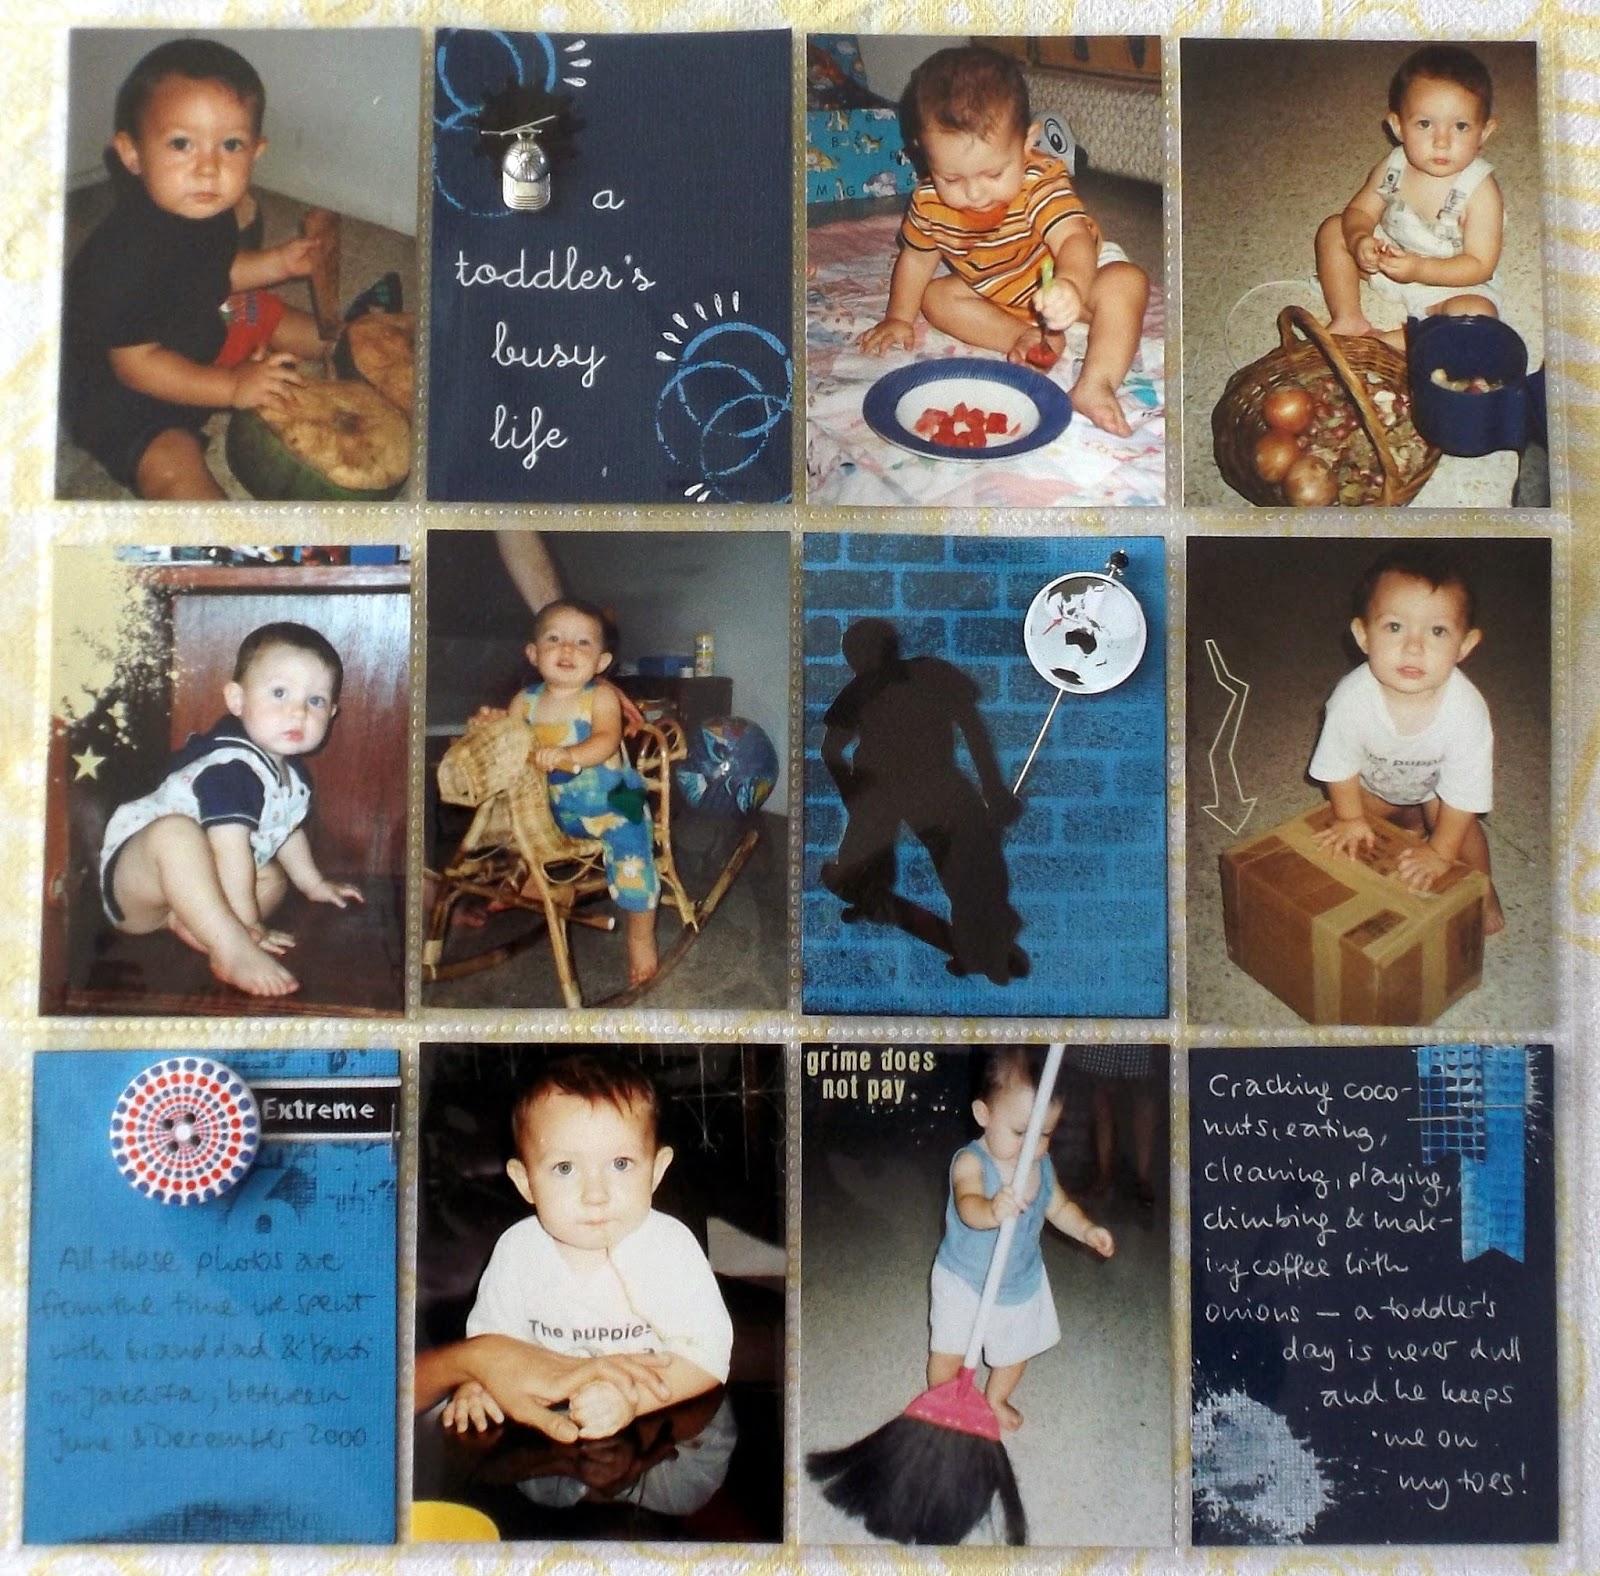
Do you like pocket pages? I do and my2angels sells some beautiful handmade sets (find the whole range here). All you really need to do is add some photos and journalling. Too easy. You can see some Charmed Life sets in action here.

 But sometimes you end up with one or two tags from the set left over and what do you do with them? Make them into cards of course! I started out with this set:

Project Life Scrapbooking

...and ended up with 5 beautiful cards:

Project Life Scrapbooking

All I did was some stamping, a patterned paper mat from my stash and a plain white card. A bit of colouring in and you are DONE! Because the tags are already beautifully decorated, there isn't much else to do. 

Project Life Scrapbooking

Use whatever colouring in technique floats your boat. I used Twinkling H2Os and water markers.

 Project Life Scrapbooking

 Not into colouring in? Leave it black and white!

Project Life Scrapbooking
  
And if you mess up the stamping? Stamp it on another piece of white paper and glue that on top. Not that would have done that...cough cough.

Project Life Scrapbooking

Outlining the white cardstock with a black pen makes it pop off the background. Broken lines are great if you don't rock at free-hand drawing straight lines (and who does?!)

Project Life Scrapbooking

So dig out some of your stamps that are collecting dust and make something beautiful with these Charmed Life pocket tags.

Pop over to my2angels now and check out the Charmed Life Collections now (and at half price they are a steal, not too mention time saving!)

GELI

Thursday, September 18, 2014

Charmed Life, Exploding Box Card.

Hi Everyone, Jen here!!

I thought I'd jump on the exploding box bandwagon!  AND since Tracy has the most gorgeous Charmed Life Kits - I thought I'd combine the two :)  Cameron turns 14 in October so I'm getting in nice and early!!  I love the Charmed life colour kits as they're so versatile! I could have just as easily made the blue kit into a "Frozen" themed Exploding Box Card!

I started with Tracy's Charmed Life Blue kit.  Since it has 4 x 2x3" cards - that was my side panels half done for me! I cut 2 of the 4x6" cards in half to create another 4 side panels and then had to decide which 4 for the outside and which 4 for the inside!! I then chose a few stamps, a couple of relevant charms and a "14" in chipboard (which I 'painted' with aquamarine Inka Gold), and die cut "Happy Birthday" from some matching dark blue cardstock.

I decorated a couple of the cards with the extra charms, stamped my greetings, wrote my message, and stuck my '14' on :).  I created a template for the box and for the lid and then cut them from white cardstock.  I distressed the edges and inked them with midnight blue stazon ink.

For the lid 'card' I cut one of the remaining 4x6 Charmed Life cards down to fit and stamped "Happy Birthday" then I added the blue bead charm.

I adhered all the cards to the box base and lid with double sided tape and put a plain dark blue square on the inside centre base.  For the 'gift' I've included 14 columbines and a rolled up $100 note in the blue bag - but shhh don't tell him!!

Closed Box...

Project Life Scrapbooking

 Take the lid off and...

Project Life Scrapbooking

This is the lid with all the 'outside' of the box...

Project Life Scrapbooking

I do hope you like Cameron's Charmed Exploding Box card, they're super easy to make as Tracy does most of the hard work for you before you even buy the Charmed Life Kit!
And they're so very effective!


Sunday, July 6, 2014

Pocket pages for lazy bums

I normally spend hours scrapping one layout, so doing 4 is not gonna happen in one day. But miracles do happen. Here is how I scrapped 22 photos on 4 pages in one evening!

 I got some of the Charmed Life sets from Tracy yesterday and decided to scrap some older photos last night. Using those sets was so easy, it felt like cheating! All the tags are already done up beatifully, all you really have to do is add photos, journaling and a title. 


Charmed Project Life

Here is page No1:
 
Charmed Project Life


 Charmed Project Life
  
The only thing I had to add was a little extra ribbon, for modesty's sake☺

Charmed Project Life

 I could have stuck one more photo here, but used it for a title instead:

Charmed Project Life
♥♥♥

This was done so quickly, I decided to rummage through the photo box and do the back of the pocket page with something girly:
Charmed Project Life
Here I used the pink mini picks...


...and some umbrella rub-ons I had in my stash. 
♥♥♥

By now I was on a roll and found so many more cool photos I hadn't scrapped yet! Out came some silly ones I took with my friends Ann-Maree and Anna.
 I used the black and white mini picks for this one. 

Charmed Project Life

Charmed Project Life

The black and white ones are great, because you can add a splash of whatever colour suits your photos! In my case, a red title...

Charmed Project Life

 ...and filled in the hearts with red Liquid Pearls (Rouge).
Charmed Project Life


A white pen and white rub-on letters work great on the black cards. 
♥♥♥

That one was done quickly too and out came the blue mini pick set. Now it actually screamed teenage boy, but my teen boy is not so keen on the camera and I wanted to use lots and lots of photos. So out came the old photo box again and I found lots from a time when Joel was little and we lived in Jakarta for a few months:

Charmed Project Life

 Just some white rub-ons for a title, some doodling...
Charmed Project Life

 ...a travel pin to show where we were (there are lots of different pins in the embellishment section)...
Charmed Project Life

... a big button (cause I needed a tiny bit of red there)...

Charmed Project Life

 ...and a bit of journalling. And in no time at all I had scrapped 8 photos! 

Charmed Project Life


So all in all, 22 photos on 4 pages in one evening wasn't really all that much hard work. Wasn't that every scrapper's original motivation, to get the photos out of their dusty boxes and into the album? So why not fill in the gaps with pocket pages!
The Charmed Life sets are gorgeous as they are (you don't need to tell they weren't handmade by you!) and if you want, add your own little touch here and there to make them truly yours.
♥♥♥
GELI

Wednesday, May 21, 2014

New Charmed Life in store now


It appears our Charmed Life ranges have proven popular with our customers. Seems I am not alone in wanting some lumpy, bumpy in my life. Lol!! The biggest request has been for more colour and theme options. And so ...


Introducing our ...


'Purple Enchantment' (full kit)

 A mix of lavender, violet and plum tones, this floral themed kit is just perfect for pretty feminine pages.  


A few close ups of the dainty bits and pieces ...

Project Life Scrapbooking  Project Life Scrapbooking


Mix and match your 'Purple Enchantment' cards with those in the coordinating  

'Lavender Dreams' Mini Pick
Set of 4 "3x4" cards 

Project Life ScrapbookingProject Life Scrapbooking


'School Days' (full kit)

"Remember the old school yard ... we used to laugh a lot ..."

You'll be the one laughing - with our new 'School Days' Charmed Life Kit. We have purposely left them white with no mounts, so that you can add your school colours to the pages. Match the colour to your formal or sports uniform - or whatever suits the photos really.

And it has a useable chalk board ,where you can write some journaling.

Now your page embellishments can be "too cool for school" as well as the kids. ;)

Project Life Scrapbooking


Project Life Scrapbooking


For the more adventurous of us and for those with the touch of the dare-devil about them - we have two new grungy Mini Pick theme sets.


'Cool Rider' Mini Pick
Set of 4 "3x4" cards

 Have a need for speed? Or do you just love the feel of all that power and the wind in your hair? You don't get cooler than this grunge collection.


Project Life Scrapbooking

Project Life Scrapbooking


'Skater Boi' Mini Pick
Set of 4 "3x4" cards

Boy or girl - this set is perfect for anyone who loves skating or where-ever you need a youth/action or urban grunge theme.


Project Life Scrapbooking


Project Life Scrapbooking


To showcase our latest range - here's how you can make a sweet card in just minutes.
Take the pretty bow card from the 'Purple Enchantment' pack - and adhere it to the front of a card.


Stamp on your sentiment (in my case "Happy Birthday").
Project Life Scrapbooking


Pop a Purple Mum Charming Chain underneath the rose ...

Project Life Scrapbooking

and in under 5 minutes, you have a quick and pretty card.


In your pack with the "mum" purple charming chain, you also get a coordinating pin. I popped that into the embellishment corner of one of the other cards in the kit - so that it can go on a layout of my mum's birthday.

 
Project Life Scrapbooking

Project Life Scrapbooking

Monday, May 12, 2014

Charmed Life and Kaisercraft Kaleidoscope

Before I even start with my latest layout, I need to apologise to everyone for my long....almost 2 months!!!!!...absence. The busy season at work (the other work...) and a bout of the flu have meant an unwanted break from scrapping and only one layout since the beginning of March! I can't believe how quickly the time has gone by and how much I've missed getting ink under my fingernails and paint on my old (and not-so-old) jeans.
So on Sunday DH was called in to work. I had some absolutely free time so I was able to finish a layout that has been sitting on my desk for at least three weeks.

I used Kaisercraft's Kaleidoscope pp's - and very pretty and versatile they are too - and matched them with some pieces from my2angels Charmed Life Vintage Notes.


The base paper is a sheet of ''Mosaic'' and I followed that with a smaller piece of ''Original'' - distressed around the edges. Over this I used Crackle Accents and a Crafters Workshop Branch template then lightly sprayed with red (I used a drop of Fired Brick Distress Reinker mixed with water), then toned down the lot when it was dry with a dry brushed layer of gesso. You can't see it very well in the photos, but it adds quite an interesting texture to the page
.
To add some interest around the edges there are some torn strips of printed tape. I used three matching Kaisercraft tapes here... ''Film Strip'', ''Happiness'' and ''Pink Damask'' all perfect with these papers and with the Vintage Notes card set.

In the blank spaces on the background I used gesso and the Twiddleybitz Bricks Template. Because I used white gesso to stencil over my already dry brushed layer of white gesso, the lines between the bricks are enhanced a little bit by brushing on a small amount of  Black Soot Distress Stain and almost immediately dabbing it off again with a tissue.

Under my photo there are two layers of red damask patterned paper - strangely the name of this paper is ''Layers''. I also used it to punch out my birds sitting on a wire, tucked in at the top of the page and to the left of the photo, and there is also a small piece forming the base for the accent in the bottom corner.


Tucked under the matted photo there is a today: journalling spot cut from ''Illustrate'' which forms part of the layout's title along with some black and white Dymo labels. Perfectly co-ordinating with it, and also with the printed tape, is a pretty card from the Vintage Notes Charmed Life card set.

Embellishing the whole I have some white painted chipboard pieces and of course my2angels flowers and a charm. The charm is an Antique Bronze Birdcage, the leaves are die cut from some leftover scraps of Kaliedescope papers so they match perfectly, and the flowers are Brown Cherry Blossoms, Cream and Brown Roses and White and Brown Rosebuds.


The accent at the bottom of the layout is also made from a card that is included in the Vintage Notes Charmed Life set - the Antique Bronze Heart Locket and Key are included.

Have a play with my2 angels Charmed Life card sets and Kaisercraft Kaleidoscope - the perfect match!

Michele xx