Showing posts with label Sports. Show all posts

Saturday, March 26, 2016

Basketball Layout

  Here is my first page layout I made for the my2angels.  I am so excited doing this layout of my son photo who likes playing basketball so very much. This layout is really a simple one to put together with beautiful embellishments, ribbon, some stamps and embossing powder. These are available at my2angels

Scrapbooking Sports Layouts


So I started by cutting some patterned paper and adding the basketball Twill Ribbon. Then I put it  together in a plain paper background. Then I positioned the photos so it can easily include some embellishments. 


After getting the right photos position I marked it and took all photos before I added stamp and green embossing powder in some spots. 

Scrapbooking Sports Layouts


I also put more embossing powder on some my2angels cog charms

Scrapbooking Sports Layouts


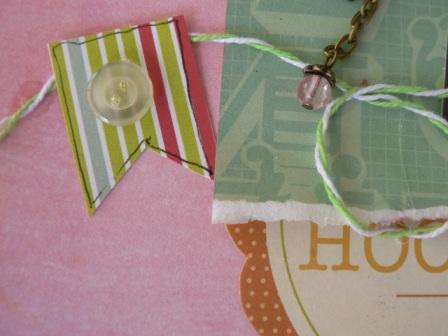
And finally I add all embellishments, basketball pin , fussy cut paper, collectables from Kaisercraft and added the stamps to the edges with black ink pad.

Scrapbooking Sports LayoutsScrapbooking Sports Layouts


I hope you like it and find it inspiring

Happy Scrapping 


Tuesday, September 9, 2014

Scrapping Sports layouts

Scrapping Sports Layouts

We all have them right?  I have hundreds and really need to get them scrapped before I forget what years etc they are and BEOFRE my pile of photos get any bigger!

Let' s start off with my main layout

Starting with white cardstock, apply texture paste or gesso down the centre


Mount your photo with cardboard, then cover with acid free cardstock (this will raise the photo, which is obviously the main focal point, and the cardstock will add a barrier between photo and the non-acid free card).  On the back of the card I added some netting which I had coloured with Glimmer Mist and Distress Ink


Placing some scrap paper the size of my photos on the cardstock, as a guide for my next step.  Using some old stickers (we all have them right?) I stuck them down the side of where my photo will be for my title.   Next I sprayed with various colours of Blue Glimmer Mist


 While I had the glimmer mist, I used the "tube" from the pump spray and run it down the sides of my cardstock for a border.


Add some circles to your layout using the lid of your distress paint.  First dabbing paint on lid, then onto layout


I also used Distress Ink in the same manner as above.


Gently removing the stickers, when the layout was near dry.  It made it easier if they were still damp to remove.  Once layout was fully dry, I drew the outline of my letters with blue pen


Added a few white roses and blue roses, just because! 
and lastly, one of our netball hoop Charms


 and finished!  One down, so many more to go!


Thursday, August 15, 2013

Cheers :)


Hi everyone, it's Geli. I'm back! 

My Hannah is passionate about cheerleading and her team won the latest competition. I'm so proud of her! Here is a layout to celebrate her latest victory:

Cheerleading Scrapbooking Layout

Do you hoard pretty paper? I do. This one (by Heidi Swapp) has been in my stash way too long. There were a few pink bits, which I painted white with gesso, cause they wouldn't match the black and yellow colour scheme. The shield shape was outlined with a black rhinestone chain. That was easy, I just glued it down 10cm at the time. Still, the paper looked a bit bland, so the middle got a bit of a black wash. (simply outline the position of the photo and go crazy with paint and water):

Cheerleading Scrapbooking Layout

It didn't look that great at this point, but once the photo went on top and one side of a black felt frame was attached, things were starting to look pretty cool.
Cheerleading Scrapbooking Layout

Have you seen the new framed sentiments? I wanted to write on the banner and while digging through my letter stickers I discovered some old rub-ons from prehistory. I managed to almost find enough letters for "cheer", but had to fake the "h" with a "q"

.
Cheerleading Scrapbooking Layout

At this point I realised that I could either give the archeologist of 3013 something to dig up or use those letters up! (I have other cool ideas for grave goods to puzzle future generations) In other words, using them to frame the photo seemed like a good way to put them to use.

Cheerleading Scrapbooking Layout

This pretty yellow frame comes with a pin too and there are lots of colours! Find them all here.


Cheerleading Scrapbooking Layout

Have you taken advantage of the 5c sale at my2angels yet? Spend $5 and get something like this black felt ribbon for 5c!

Cheerleading Scrapbooking Layout

I cut some stars off and painted the inside with Ferro metal effect textured paint. This stuff is really cool, it has a gritty texture but keeps its metallic shine.
Then I added a crown charm (after all, they won!)...


DSCF1167.JPG

DSCF1170.JPG
 
DSCF1171.JPG

The cheerleader's pom poms and the star flower are also painted with the same metal effect paint 

Pretty cool that it sticks to metal!

Hannah loves her page and I hope I have given you some inspiration!

GELI

Monday, December 24, 2012

Merry Christmas everyone and lots of catch up layouts


We at my2angels would like to wish all our customers and their families a Merry Christmas and a Happy New Year. Thank you for the support throughout the year and we look forward to sharing our creations with you (and you with us) in 2013. May you have a safe and festive time.


my2angels  offers Gift Vouchers to give to your scrapping friends or family this Chrsitmas OR drop those hints for your family and friends to give to you for a perfect gift this year.  

And yes ,we are open over the Christmas Holidays for purchases (no rest for the wicked).  Just as well we were open last year, as one hubby purchased a gift voucher for his wife at 5.30pm on Christmas Eve (typical male!). It might have been late - but at least it was a good gift.

We are talking a break from blogging until the New Year (even though we are still open), but we are leaving you with a few layouts that we haven't had time to post on the blog yet.


Geli here - with my final project for the year.


 This piece is about my husband's brothers, living the good life in Vanuatu. As you can see, they're working extremely hard ... 


 ... about as hard as a pair of sloths in a tree ...


I found this chipboard frame at Kaisercraft. It's a little bigger than 12x12". I painted it, crackled it, sanded it, misted it ... the poor thing has seen 100 years of wear and tear in one afternoon.


The paper is all from the gorgeous new Tropicana collection, nice and beachy with a touch of vintage.


A lot of the embellishments, like the net, the beach sign and the charms came from the my2angels beach kit (click on the word to find it).


Would you like to know how to make this bottle cap embellishment? Click here to go to my bottle cap magnets tutorial, they are fun and easy to make and make great gifts for teachers and friends.


Cheers, Geli 


 Lisa here ...


As I get older, my hair just gets curlier and curlier - I am certain I will end my days as a fully blown poodle!! As a teenager I used to get my hair permed - now I wonder why the heck I needed to?

So I had fun with these old photos and this one is of me as a little girl and shows that I even had curls back then. I am seriously loving the colours in the Carta Bella Alphabet Junction papers and they were perfect for this photo!

To start with, I used my favourite Crafter's Workshop template - the spotty dotties - together with my Tim Holtz Broken China distress ink to create an interesting background.


I then used a series of smaller cut sections of Alphabet Junction papers - the blue under the photo is the backside of Dear Dear Little Dots . I then cut a long strip of the pink spotted Handwriting - again using the B side. I also had a small strip of the green Alphacards, which I slipped in under the blue paper.


In the top, right-hand corner under where the photo would sit ,I used some of the reverse side Alphabet banner. I also pleated a strip of the striped Delightful stripe and adhered it across the pink paper for additional burst of colour.


I am a HUGE lover of ric rac - it's so versatile and easy to use ... and Tracy has an awesome ramge. I have used some of the pretty pink ric rac, but you could use any range of colours, depending on the primary colours in your photo!!

I then went to the coordinated sticker sheet and selected a range of stickers to add to my layout. I always love a journal spot or two and I also liked some of the coordinating strips, so I added a couple once I had adhered my photo. I also slipped in a pretty, small doily under the top left side of the photos and cut it and used the remainder at the bottom right. I find it just added a bit of softness and prettiness!!

Tracy also has some wicked buttons and some gorgeous resin flowers,  so I had to add a couple of those!!


As a last minute touch I couldnt resist Tracys gorgeous fairy girl charms.
Finally, I used the alphabet sticker sheet for my title, using two different fonts.


I also like to outline some of my papers when they have a white background, just so they stand out a little more ... I love the little touches like this to finish a layout.
What do you think??

 
and another layout
I've put them together with some more gorgeous Save the Date from Kaiser - so that I could scrap this photo from Teleah's fifth birthday, which we celebrated at Noosa ... one of our favourite holiday spots!!
I used a plain pink background paper and then added a piece of Save the Date Streamers to it. Then I used the strips from the bottoms of the papers (clever huh!!) to add some more interest - they look like strips of ribbon.

I also added a length of pink ric rac - just because I LOVE ric rac!!
I handcut a banner and adhered that to both sides of the photo and then I added some clusters of flowers, using the gorgeous Gardenias and Roses available in the my2angels store.


Tracy also makes the most fabulous handmade embellishments and I was able to include this little beauty on this page ... the Pink Present charming chain. These are available in several colours and I just love them all!!!


Using off-cuts, I  made my own little funky banner and decorated it with buttons, cutouts and stickers, before attaching it to the page with some green twine.


After inking the edges, I used the square die cut element from the HIP HIP paper for my title "Today I turn...5".


And here is the final layout.


LISA


JESS HERE

Righto ... I have a scrappy share today. This is a just cos layout.
I've been having a play with the Kaisercraft "Save the Date" range. 
 Usually I'm not super keen on really "themed" ranges, but this one really caught my eye. The colours are fab and all the embellishments & stickers etc that come with the range are super cute.


I'm really loving layering pennant/banners at the moment ... as well as loving "splats" on my page. I've had a couple people ask how to do them, my2angels has a tutorial HERE on how to do them : )

How cute are these cabochons over the save the date heart rubons! 


Layers, layers , and more layers ...


Here is a list of products I used:

- Kaisercraft "Save The Date" Papers, Aplha Stickers, Rubons Stickers & Pennant/Banners.
-Distress Stain in "Mustard Seed" for splats.
-Glimmer Glaze in "Oil Slick" for black paint splatters.
 -Glimmer Glam in "mermaid" for stamped circles.
- Manila tag.
-Scrapware "ATC Frame". Which I painted with white paint and doodled on.
-White scalloped edge felt frame.
-Transparent glass Cabochons.
-Black and White spotted acrylic button.
-Small holed red acrylic button.
-Staz on ink pad in Jet black.
-Baker's Twine in Teal & White.
-Tim holtz paper rosette die.
-black cotton thread.
-black pilot permaball pen.
-Chevron washi tape.

love and peace xox

Jess

PS.  Have you seen Keonie's fantastic layouts and cards in the gallery where she uses 'Save the Date'?

I love the different styles of layouts she has used .. here is the link to view them all.


and lastly, from me, 
Tracy

with some layouts using our Sport Embellishments


with Plain Cardstock and scrap pattern paper to create this double layout
with Jack Frost Glimmer Mist flicked over the snowflake coredinations cardstock


Left Side


with our blue flowers

and
Stampendous Marine Aged Embossing Powder on the chipboard letters


our cheerleader charms
and Royal Blue Liquid Pearls to create the circles on the background


and the right side


with more of our blue flowers
on the powder blue rockabye thickers for the date I sprinkled Stampendous Powder Blue Fragments


and now using our Softball Pins


Softball Charm


and Cheerleader charm


with our blue star felt ribbon, blue felt star and Tim Holtz Rosette


Stampendous Marine Aged Embossing Powder on the chipboard letters


I wiped a little Timber Brown Stazon on the Softball Charm to tone down the silver and blend in with the gold in the embossing powder on the title


See you all in 2013
PS Keep an eye on the new arrivals section we have lots arriving in time for the New Year