Showing posts with label Distress Inks. Show all posts

Friday, July 12, 2013

Yellow Week, Imagine the possibilities...

Hello Everyone

Jennifer with you here today!    In honour of "Yellow Week", I created a quick card!  I love this combination of black and white, teamed with the lovely bright yellows.


I had fun playing with the Tim Holtz Idea-Ology Mask Sheets again - using a die to create the cutout, and using my ink blending tool - first with squeezed lemonade and then mustard seed distress inks.  Once I had removed the mask, I stamped the Kaiser Stamp slightly off-set with black Archival Ink.

I used the sponge applicator again to change the colour of the roses slightly from the cream colour to the matching hue of the yellow already on the card.  
I curled the stems of the flowers and put them together in a bunch, adhering them to the card with hot glue. Next I used black distress stain to colour the white pre-tied ribbon bow, the silver thread adds that little touch of bling; adhering it once again with hot glue.

I also coloured one on the words from Tim Holtz ChitChat sheets - "imagine" to match the card, again with my ink blending tool.  I also sponged the edges of the envelope and then inked them in black Archival Ink as well.


Thanks for stopping by - I hope you'll be using some yellow this week!  If you go to grab some yellow and realise you don't have any - pop on over to the my2angels shop because everything yellow is on special!!

Cheers,
Jen
:-)

Thursday, June 13, 2013

Getting Inky!

Hi everyone,
it's Tina Connolly with a layout I'd like to share with you. 


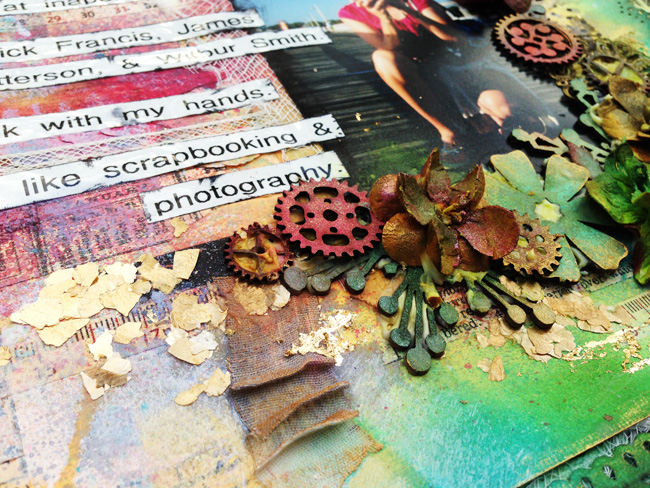
I had lots of fun creating this.  Would you believe the main paper started life as a piece of plain white cardstock?  Yes, it's true!  
I layered various washi tapes onto my paper both vertically and horizontally in a random manner.  


I pulled out my Tim Holtz Distress Inks and began shading with a variety of colours to match my backing sheet.  I've used Chipped Sapphire, Peacock Feathers,  Barn Door, Salty Ocean,  and Mowed Lawn.  The best way to apply the colour is with a Inkssentials Blending Tool used in a circular motion.  


(Tracy tells me that all distress inks OOS will be back in store mid next week along with LOTS of new goodies)
 
I sprayed some Glimmer Mist Wheat Beer to add some golden yellow to the page.


Scrapbooking Mixed Media


Using my Twiddleybitz Chicken Wire stencil and sponged Gesso through it to create extra depth. 

Scrapbooking Mixed Media


 Of course I had to use some my2angels flowers on the page. 
 I coloured them with Glimmer Mist before attaching to my page.  


I've tucked an Antique Bronze Round Floral Flower Filigree under a Twiddleybitz Tweeny Chipboard Cog.  These cogs are my must have, go-to product at the moment.  I use them on so many projects, both feminine and masculine, and have even used them as flower centres on an ultra girly page.  

Scrapbooking Mixed Media


 My journaling was from a prompt which included " I drive, I go, I talk....".  It gives a quick and easy insight to my life right now and some of the things I do.


Scrapbooking Mixed Media


I hope I've inspired you to get inky and have fun playing with your products.  Remember, don't be afraid to alter your papers and embellishments to suit your page. 


Happy scrapping,
Tina

Wednesday, January 23, 2013

Charming Words Card

Here is just a quick card using the charming words from my2angels.  


 This one is the tangerine forever word, but there are lots of colours and words available. They make it easy to take a piece of paper from scrap to fab. 


I also added some of the new gold twine and the pictures don't do it justice, it really is sparkly and pretty in real life. (Pssst, there is silver twine too, find it here.)

To create the multi-coloured piece of paper I placed a mask (find lots of designs here) on a white piece of paper and inked all over it with clear Versamark ink. This means that the in-between bits of the mask get inked. 
Then I embossed it with clear embossing powder and inked the cardstock with Distress Ink in mustard seed, spiced marmalade and peeled paint. A blending tool is best for this, but a scrap of felt works too. The ink will only stick to the bits that weren't embossed and it will leave you with a lovely batik effect. It looks best with masks that don't have a lot of fine details.
GELI

Saturday, January 19, 2013

Step by Step Card with new Laughter Charming Word

So whilst Ngaire is away and unable to visit me - I thought I would quickly use her favourite new Antique Bronze and Tangerine Laughter Charming Word - that way I could gloat about getting to use one before she does.

So I made this cute little card - and just to make her even more jealous - here is a step-by-step card tutorial so you can make one too.


Ink your ink blending tool, with some Spiced Marmalade Distress Ink and blend all over your card.

When dry, put your card through your cuttlebug (or similar machine) with a floral embossing folder (I used the one that comes free when you purchase a cuttlebug).

Then swipe your Spiced Marmalade Distress Ink Pad over the embossing and the edges.  The pad will colour the raised embossing and create a two-tone as the ink blending.  Only some of this will show on the final card, but it's easier to cover the card fully now, than trying to work out where it will be exposed on the final result.


From Reflections Talavera - cut 6 pieces, measuring 10cm x 14.2cm.

 This will give you 6 cards, I might as well "be prepared" as we were taught in Brownies and have some extras. It's all the more of these Charming Words I can use up before Ngaire gets home.

  Ink lightly with Spiced Marmalade Distress Ink.


Now from the top of  your Reflections Talavera, tear a 5cm strip from the left-hand side on an angle and then a 4cm from the right-hand side down on an angle. Throw out the middle piece.

 Distress & scrunch the torn edges and using your ink pad, directly ink the paper with Spiced Marmalade Distress Ink.


Now adhere the 2 pieces to your card.  Leave a border of a couple of millimetres, so a little of the  inked pattern on the kraft card shows.


Now place your:_
in a cluster towards the bottom of your torn middle.

When you are happy with their placement, adhere them to the card.


To finish, add your greeting with small letter stickers.


Oh dear!!!

Try and get your letters right, didn't realise they were crooked until I uploaded the photo lol.