Thursday, December 22, 2011

Christmas layouts

 To end the year off 
here are several Christmas projects I have been creating in the past few weeks

Firstly, a 3 layout class I held here last week using the new Teresa Collins Christmas Home Papers, which you will find in the new arrivals


and the double layout
(sorry couldn't them get any larger & side by side but click on the photo if you want to see a up close)

To create the custard / icing I used White Opal Liquid Pearls


Loving the Red Glitter Zing Embossing Powder on the black cardstock


Using our new 15cm Large Mulberry Flowers as my background for this mini OTP


Products used:

Scrapware Chipboard Christmas house covered in Picket Fence Crackle paint
Chipboard Christmas Trees that I embossed with Sizzix Texture Fades Folder then heat embossed with Zing Silver Glitter Embossing Powder


 Here is a bit more of a boy/grunge Christmas layout using Graphic 45 ABC Primer Papers


Pizza Box baubles painted with Fired Brick Distress Crackle Paint hanging from our Brown Rhinestone Chain with silver holly charms


We are open throughout the holidays for enquiries and orders
but will be taking a break from blogging until the New Year 

From the Angels household to yours
We wish you and your family a safe and happy Christmas 
and may the New Year bring you lots of mojo and time to create

Friday, December 16, 2011

Tags and Winners


Everyone who purchased my2angels Charming Charms between 1st-12th December went into the draw to win the complete collection of Charming Charms

And the winner is ....


Anita Sutton

since there were so many of you who purchased our Charming Chains we couldn't just have one winner
so the following ladies will receive 3 charming chains of their choice

Margaret Rivers
Jennifer Hodges
and Melanie Stewart

Congratulations
Please email me with your choice of charming chains ladies

Graphic 45 had a facebook challenge to make a Christmas Card using Graphic 45 products, so I thought I would give it a good using their ABC Primer papers


(Thank you to Keonie who let me use her Tim Holtz die that I ordered in for her)


and then I kind of got hooked and made these ones as well

another one using Graphic 45 ABC Primer
Looking in the window


And using a pizza box for a door


(I got the idea for this tag from Tammy Tutterow's blog)


 And now I am tempted to ignore all the other projects I have in progress and play with Authentique Wonder Collection
(You will find them in the new arrivals section)


TFL
Hope you have a creative and great weekend


Wednesday, December 14, 2011

Corkboard Christmas Presents

 Corkboard Christmas Presents
by Geli


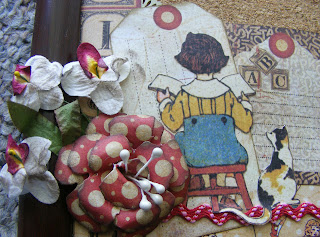
I wanted to do something for the kids teachers and it'd be a good last minute Christmas present too, if you're looking for ideas.

I couldn't find the right sized cork board, so I made my own. At a cheap shop I bought 3 document frames, about A4 ($2.50 each) and 6 sheets of cork ($2.50 for 2). I took off the glass, glued 2 cork sheets on the backing cardstock and glued on all papers and decorations with Helmar glue. I used the vintage school paper from Graphics45, available at my2angels. The vintage look goes so great with the cork.


The papers I used are:
Calico Kids and 

Here are some details:
(I love this stuff!!!):


a handmade flower with a skeleton leaf:


some orchids:


another handmade flower:


sweet little apple charm:


and yet another handmade flower (I was on a roll) 
with leaves and a felt heart:


So, if you are still looking for some Christmas pressies to make, try some cork boards!

GELI

Saturday, December 10, 2011

SALE SALE SALE

Last Days to grab a Bargin

  You only have until the 12th December (midnight Queensland time)

to get 25% off everything in store  (this includes all items already on sale)
 
You MUST enter CHRISTMAS at checkout in the promotional code box to receive the discount.
 
(does not include subscriptions, gift certificates or our Christmas Kits
please purchase these in a separate order)
 
AND everyone who purchases a my2angels Charming Chain before 12th December will go in the draw to win the complete collection of our Charming Chains (perfect present to put under the Christmas Tree for YOU!)
 

Tuesday, December 6, 2011

Bo Bunny Enchanted with Jess

Hey there GORGEOUS bloggy buddies : )

Remember when I told ya'll about Bo Bunny - Enchanted at my2angels?
Well I got sent some from Tracy, man I am one very spoilt dt angel!!!!

This paper range is so very versatile. It just screams out for you to add colour! It's a great range to add stickers, alphas, journalling blocks etc that you've got leftover from other paper ranges as well.
For my first layout I added yellow....gotta love yellow, black & white combo......

For the background I spread gesso on the paper with an old credit card then used the inkssentials blending tool with Tim Holtz distress ink - mustard seed over the Crafter's workshop - swiss dot template.....if you haven't got any Crafter's Workshop templates......GET YOURSELF SOME!!!!! They are awesome! You can use all sorts of mediums on them; spraysinksstainspaint dabbers, texture paste.....the list goes on.....


 A cute small heart locket charm which I tucked under the paper rosette flower. The flower is made with the Sizzix Sizzlits Decorative Strip Die By Tim Holtz, I attached a large yellow acrylic button to the centre with charcoal bakers twine. Instead of using twine for making swirly whirly loops on my page I thought I'd try something different, so I used the black acrylic chain with rhinestones, it suits the glitter accents of the paper range.


Here I've used a black scroll felt heart layered over a small yellow acrylic button and a white with yellow centre mulberry flower. The tag is made with a manila tag, which I stamped with clear ink, then embossed with Zing clear embossing powder. I then coloured the whole tag with Tim Holtz distress stain - mustard seed, make sure to pat the tag with paper tower after using the distress stain, the stamping will show through even better.


Ok next up is layout number 2. I've used another fave colour combo, red, white & black. 
I created the "circles" by cutting a large and small circle out of old card stock to use as a mask. I dabbed around the edge of the mask with Tim Holtz distress stain - fired brick, just remember the harder you "dab" the distress stain down, the more ink comes out, which means bigger "splats". The red layer under the photo is made with Tim Holtz kraft core - No.3, which I embossed with a cuttlebug embossing folder - tiny bubbles, which I lightly sanded. The paper "tabs" are made using the Sissix on the edge die.


I cut the "small" side off a black felt scroll frame, and layered it over paper and a scrapware square bracket notebook chippy. I attached a large red acrylic button with charcoal bakers twine & added a butterfly (I layered three on top of each other) which I blinged up with some red pearls


As this layout is about my gorgeous little man being a gift to us, I made a gift bow style flower to go with the theme. I made the bow with Tim Holtz film strip ribbon, a small red acrylic button and some charcoal bakers twine.


I SO love these ladybug charms!


And there you have it folks.....a wee bit of Bo Bunny - Enchanted : )

I hope everyone is having an awesome Chrissy season!!!

Love and Peace xox

Jess