
Hi there, Michele here again, this time with another Kaisercraft Sears & Son layout.
This one is grungy, misted, inked, and distressed and features a very old photo of my father as a young man. I had a feeling this range would be perfect for a vintage layout....and I think I was right. It was great to work with and I think it turned out well.
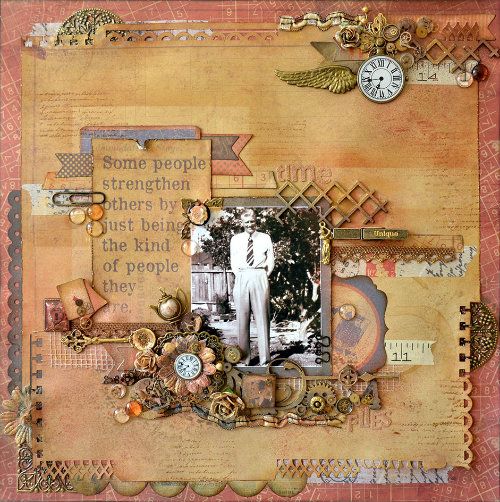
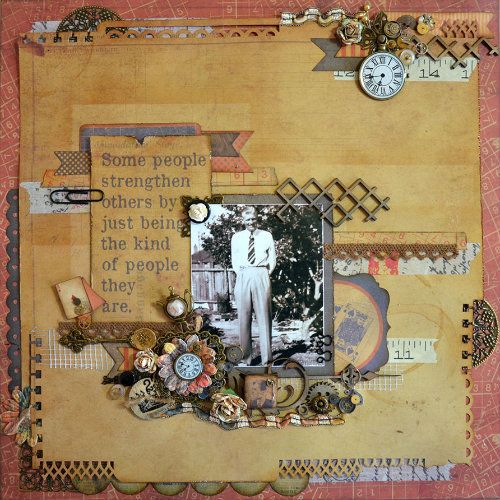
Here is the finished layout, and what follows are the steps I took to create it. Get a cuppa, sit back and relax - I think this is going to be a longish post ;)
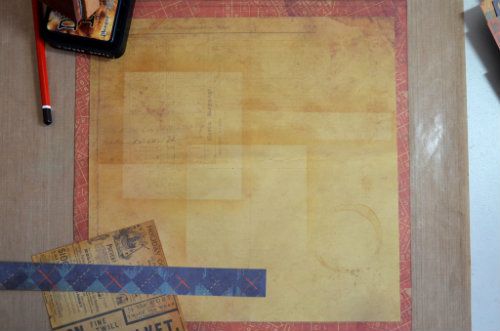
I started with two sheets of Sears & Son paper ... 'Tailor' - a rich rusty colour printed with a tan coloured grid and numbers, which formed the base: and the reverse of 'Trilby', a fairly plain, tan paper, which I trimmed down to 11''x11''. Then I cut a small piece of the black reverse of 'Charming' to act as my photo mat.
I marked the centre of the page with a pencil and then used one of the strips I cut from 'Trilby', together with the back of my photo mat as stencils. This allowed me to ink up a couple of ghost layers onto the page, using a light application of Vintage Photo Distress Ink and an Inkssentials Ink Blending Tool. I also inked the edges of both papers with Black Soot and Vintage Photo inks.
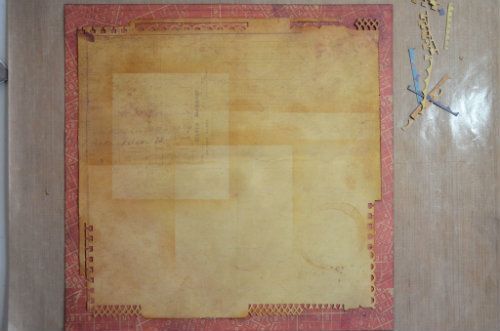
The next step was to punch the edges with various punches, distress the un-punched areas and stick the paper down - just in the centre though, so that I could still tuck bits and pieces underneath easily.

I added several things to both the outside and the inside of the page.
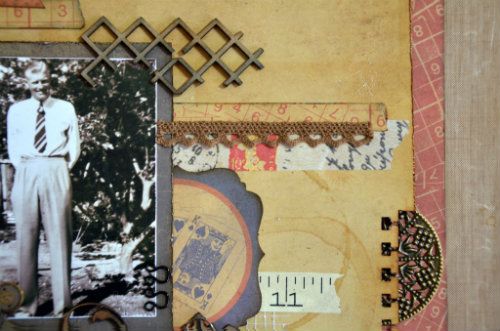
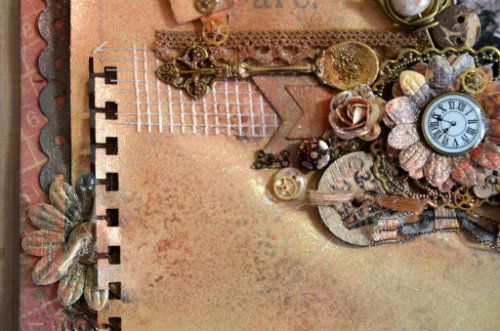
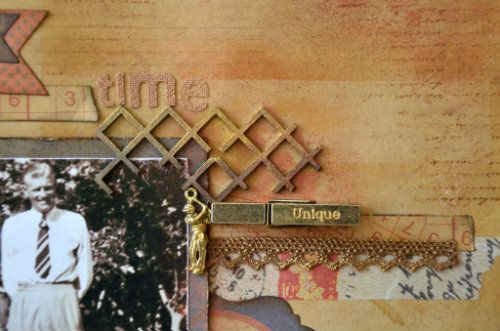
Around the edges, tucked under the punched out areas are some Ideaology Tissue Tape, sticky Plasterer's mesh, a strip of punched black 'Charming' paper, a green scalloped die cut piece from the Sears & Son 6.5'' Paper Pad, an orange flag - one of the Sears & Son Collectables, an Antique Bronze Round filigree (cut in half) and an Antique Bronze Square Filigree (with one corner removed and used elsewhere).
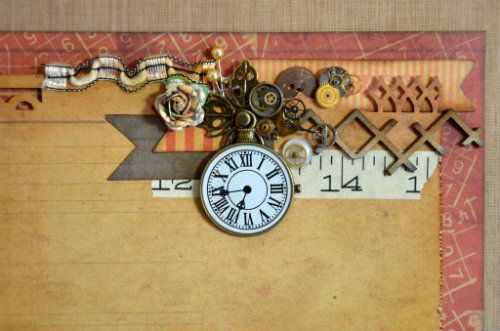
Paying attention to where the centre of the page was, and using the inked areas as guides as well, I added some strips of Tissue Tape, Washi Tape, two Flags from the Collectables pack and one cut from a strip of 'Charming', a bit more Plasterer's Mesh and the Manufacturer's strip from Moustache, torn in half and inked with Black Soot and Vintage Photo. There are a couple of extra, round tea stains there too, using Antique Linen Distrss Stain diluted with a spritz of water and the bottom of my tea cup.
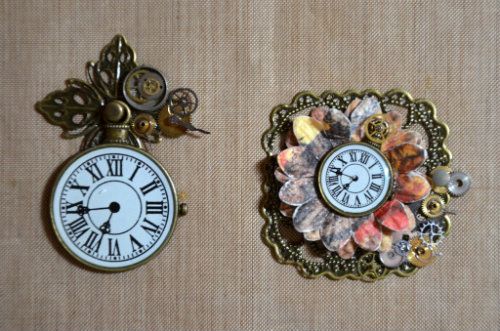
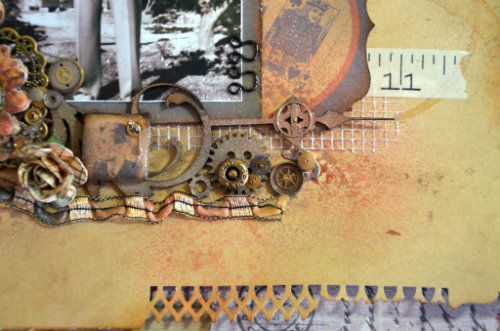
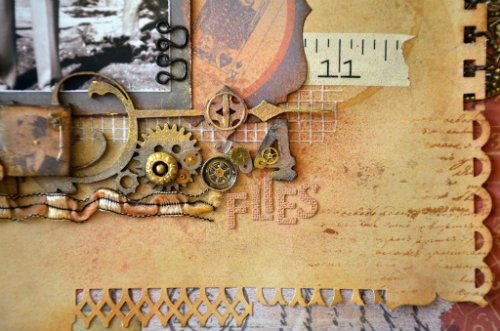
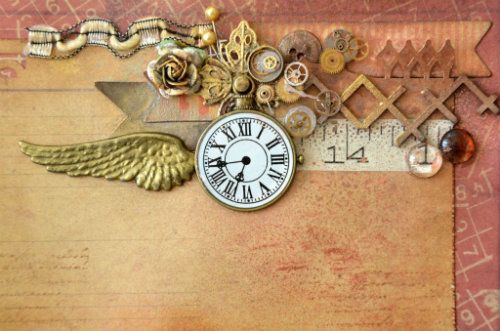
Looking at the Filigrees I had placed around the edges, I decided to use a couple more, along with some watch parts DH acquired for me on Ebay (wonderful man!) and some Clock charms from my2angels to make some matching, larger embellishments for this layout. I took these....
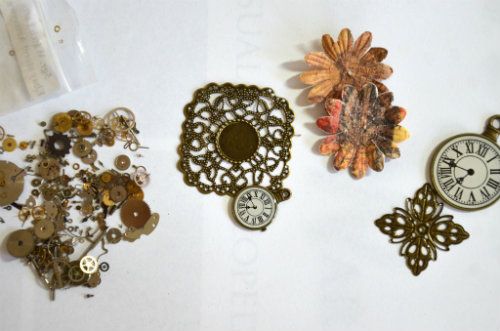
... and came up with these - using the Antique Bronze Square Filigree with Centre Circle, Filigree Cross, Antique Bronze Timepiece in both the large and small sizes (the larger one is the one I have linked here), two old flowers from my stash, a bronze brad and the tiny watch parts. I stuck all the bits and pieces on with Glossy Accents and tweezers and my eyes will never be the same again LOL!!
This kind of layout tends to grow in an almost organic way, having bits and pieces added to it as it grows, so after adding my embellishments I also added a few more things and ended up with this:
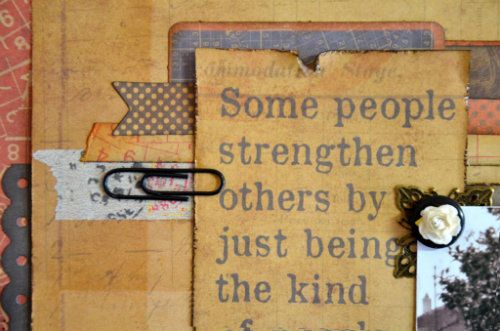
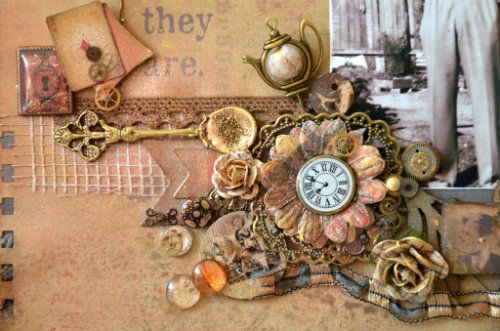
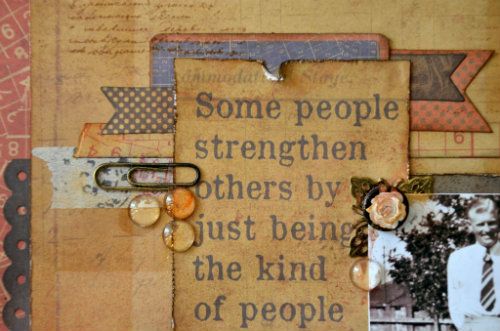
As you can see, my ''few more things'' was really quite a lot. Notably, there is a quote cut from 'Sidecar', several smaller flags from the 12x12 Sticker Sheet, some brown lace, chipboard bits and pieces - all cut from larger pieces and inked with Black Soot and Vintage Photo Distress Inks, lots more Collectables (Diamond, Ace of Diamonds, King of Spades) a die cut tag at the top of the quote from the 6.5" Paper Pad), a few Prima roses and some fibres ... I think this one was a left over from a scarf my mother knitted ...
There's also a Prima wooden button, several small buttons from my Grandma's button tin, some small hooks and eyes, a paperclip and a gorgeous Antique Bronze Spoon, which I filled twice with Stampendous Aged Gold Embossing Powder. The second time I didn't heat it to melting point, so that the grains still show up. Love it! I made a decorative tile myself, using some Sculpey modelling clay and then covered it with a piece of paper cut from 'Charming' (a man's head). I distressed and inked the edges and added a couple of watch parts to the top.
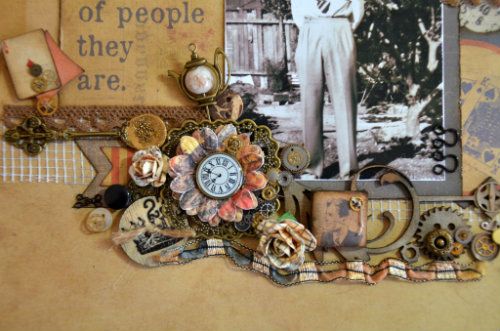
Two pearl headed pins are stuck in at the top and a gorgeous my2angels Antique Bronze, Cream and Brown Teapot Pin fills a space at the end of the quote. How cute, and how appropriate - a cuppa and a chat fixed almost anything according to my Dad :)


Now you may think that this is the end ... nothing more to do ... but I'm afraid not. This was when I started with the misting!
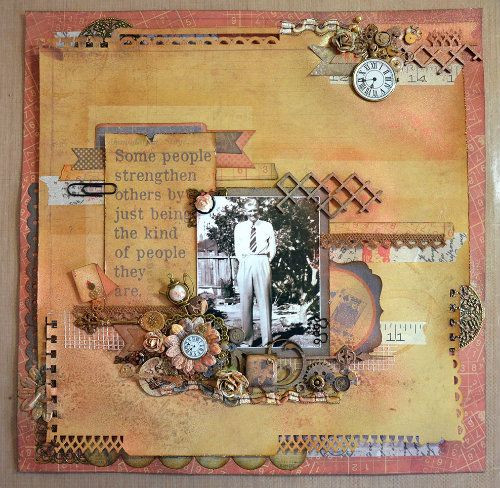
I used Ranger Perfect Pearls mixed with water in a Mini Mister on this layout. This gives a gorgeous shimmer to everything, without adding too much colour. The amount of colour depends on the amount of pigment you use, so you can make the colours stronger if you want to. There are two colours here - Copper and Heirloom Gold. Here are some close-ups:

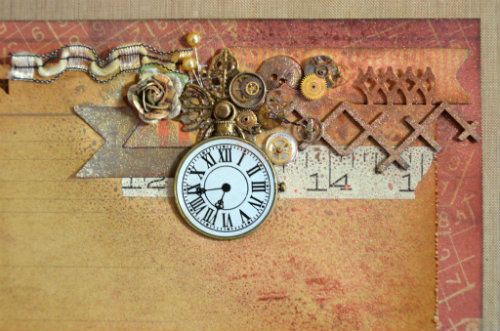
I dabbed the spray off the clock faces and the excess off the paper with a baby wipe straight away, and also covered the photo with baby wipes to keep the mist off it. Because the baby wipes are already damp, they don't absorb the spray and keep the photo clean, but you need to be sure they are safe to use on your photos as well. Depending on the type of paper you use or where your photos are processed, sometimes the wipes can damage the print. I always lay them on as lightly as possible, just in case.
The final process was a highlighting of certain areas with gold acrylic paint. You can also use Rub 'n Buff. I used my finger to rub the gold onto parts of the embellishments, for example the Antique Bronze Spoon, the edges of the roses, the lace and the chipboard .
At this stage I also added a few more embellishments - just in case I didn't have enough LOL! There are several 10mm Glass Cabochons - some are coloured on the flat edge with Copic Markers to match the colours in the layout. There are three different browns. Because the Copics are alcohol based, they colour the glass really nicely while still keeping their transparency :)
I also added a title using Prima Canvas alphas and a metal peg from Graphic 45 (Unique).
Finally I turned a silver Angel Wing and a Man Playing Golf Charm to gold - using Versamark Ink and Gold Embossing powder.
So that's it. If you are still with me, congratulations on your patience and perserverence :) I really enjoyed creating this layout, especially adding the details, but this step by step probably took me longer to write!!
Here's the final layout again...in case you've forgotton what it looks like, way up there at the beginning of this post LOL!
Try the Kaisercraft Sears & Son range - I guarantee you'll love it!
Michele


3 comments:
Layout is just fantastic. love all the bits & pieces you have put in it . I'm liking "sears & sons" papers more after seeing what can be done with them. Great work. x
Thank you Elaine :)
Awesome stuff Michele xx
Post a Comment