Friday, February 22, 2013

Blue Lemonade and Crushed Ice Sugarbeads


The cool, flowing beads of sugar water and ice chips make Blue Lemonade the perfect touch for beach or pool themed layouts. Splash a little on one now.


Crushed Ice Sugar Beads

Sparkling with the frigid beauty of shattered icicles - Crushed Ice gives you instant snowflakes or diamonds and is the epitome of glittery glam.


Let's start by playing with our Blue Lemonade Sugar Beads
and a water themed layout.

 
Using my fingers, I wiped texture magic,   over a sheet of Carta Bella Alphabet Junction Tossed Letters and over the edges of my photo.  Then wait for it to dry.

You really must check out the alphabet junction range if you like to use a background paper with just a touch of pattern! The one I used has water droplet patterns ... perfect for this layout.


I had no plan for this layout at the time of starting, so I just used what was within hands-reach that was ROUND, in keeping with the water theme of the photos.  

 My first addition was our new Blue Lemonade Sugar Beads,
 Which was then followed with:
various sizes of jumprings and cabochons,
some silver rhinestone circles,
a silver brass filigree (cut in half), 
a made with a smile charm and rainbow charm
and scrap chipboard letters for my title

 Because I am coating the layout with mists and mediums, the colour of the letters doesn't matter too much, as everything will change colour once I apply the mediums and mists.

I then basically just tossed it all on and used Dimensional Magic to adhere everything where-ever it landed. You don't get much easier than that.


 I didn't need to be neat and tidy with the gluing, as my next step was to paint over everything with Claudine Hellmuth Multi Medium Matte.  Again, leave till completely dry.  

This is it before-hand (looking a right mess, but god love multi-mediums and glimmer mists!).

Pretty boring and messy but ...

(Sorry the photo is of poor quality, but I wanted to paint it with Claudine Hellmuth Mulit Medium before I went to bed.)


After a good nights sleep ...
 I then attacked it with:

Jack Frost Glimmer Mist
Tiger Lily Glimmer Mist
and Sun Sisters Glimmer Mist
(Make sure you cover your photos with scrap paper, so you don't get mist over them!)

I created some paint circles using the lid of my dabber.  I like how it doesn't create a full circle, because of the dimension of the different elements I am daubing it over.


After it dried, I added a few more Blue Lemonade Sugar Beads for just a hint of glimmer and added brightness ...


and here is the completed layout.


The techniques used here are very similar to the Water multi-medium class we have this coming Sunday at my2angels.

I should have shown DD the layout before writing up this post though, as she advises me it was not Wet n Wild, but White Water World ... whoops!


And now for our gorgeous, icy  Crushed Ice Sugar Beads.


Start your layout with a sheet of Snowflake Coordations cardstock  - then add some "splats" of Brushed Pewter Metallic Distress Stain and sprinkles of Crushed Ice Sugar Beads for your background


Paint a Twiddleybitz Small Swirl Chipboard Frame with Brushed Pewter Metallic Distress Stain and then use some Dimensional Magic to adhere more Crushed Ice Sugar Beads over the frame.  

Once dry, give it another coat of Dimensional Magic. This is needed, because the frame is thin in width and the sugar beads neede that extra bit of security.

What is a christmas layout without an Angel?

Add one of our Angel in a Heart charms and also a Curly Christmas Tree charm; some
Metallic Silver Skeleton Leaves and Metallic Silver Poinsettias; and finish off with some twisted white scalloped edged organza ribbon.


And lastly, add a light sprinkling of Crushed Ice Sugar Beads over the white stemmed flowers.


Now how about making some flowers with Sugar Beads?

Using my Tim Holtz Tattered Floral die, I put it through my cuttlebug using satin fabric. Only the smallest flower was used.  

Next, I added a blob of Glossy Accents to the centre of the flower and after adding a couple of 5mm Silver Rhinestones, sprinkled over some Crushed Ice Sugar Beads.
Here's a couple of photos of my starting materials ... 


So let's use the flowers on a card ...


I used a Twiddleybitz C6 Black Card for my base. I started by spraying Pearl Glimmer Mist over a Twiddleybitz Flower Flourish Vine. Spray the vine while it is on the card - that is what gives you that stunning pattern you can see behind it - it's all pearly and shimmery and looks gorgeous.

Then I cut my vine up to make it easier to fit on the card. (I still have leaf bits left over for future projects too.)

You could use the complete flourish (instead of cutting it up) as a side border on a layout; or use the cut bits to keep it small for a mini album. Just a little thinking outside the 12x12 can open up all sorts of ideas. :)


Next comes the cool part ... playing with a new product - Stampendous Stamp N Bond Powder .

I painted my chipboard flourish with Brushed Pewter Distress Stain and while still wet, I sprinkled over Stampendous Stamp N Bond Powder. Apply some heat with a heat gun and then ... 

The next step is to sprinkle over silver microbeads and leave for a minute or two.  I am seriously impressed with this product and recommend it for adhering glitter, microbeads and sugar beads ... talk about sticking power!


Then I glued my flourish to the card, added some of my handmade sugar bead flowers and popped on a few small daisy charms  and some trimmed black and white stemmed flowers.

My Happy Birthday greeting is a bit of white card (put through my cuttlebug using the Tattered Banner Die and) stamped Happy Birthday with Black Versamagic Ink.

For a finishing touch, I sprinkled Coconut Ice Sugar Beads over the card and then (using a pink paint dabber), painted around the edge of the card. 


Wednesday, February 20, 2013

Licorice Twist with Strawberry Shortcake Sugar Beads


Black and Silver Sugar Beads

Velvety, black beads mingled with cold silver - Licorice Twist is ultra chic and fashionable and provides an elegant touch to your creation.


scrapbooking beading embellishments


Red and White Sugar Beads
A Berrylicious combination of strawberry red and silver beads - Strawberry Shortcake is a sweet (but non-fattening) treat for your cards and layouts.


scrapbooking beading embellishments 


Here's a great idea for your scrapbooking buddy or sewing friend's birthday
using our Licorice Twist Sugar Beads.
A birthday card with a gift!


scrapbooking beading embellishments


For the base of the card, I used a Twiddleybitz C6 Black Card.  They make card-making so quick and easy. To begin, I inked the edges of the card with
Versamagic Starlight Silver.

Then I cut out 2 pieces of coordinating fabric and using a glue stick, adhered them to my card.  I use a glue stick for this, because it makes it easier to scrunch up the fabric than using tape and if you use liquid glue it will show through the fabric.  My top fabric was tulle, but I used my hot glue gun for that, because it will be covered by other items.

Heat emboss some Black Glitter Zing! over a Twiddleybitz Vintage Mini Chipboard Mannequin.

With liquid glue sprinkle over the top of the Mannequin with Licorice Twist Sugar Beads

Create a skirt using some fabric. To make the waist band, glue on a piece of silver cup chain across the waist.  Adhere the mannequin chippy to the card. I used my hot glue gun again, as it will hold down the top layer of tulle well.
scrapbooking beading embellishments 

Cut two cotton reels from black cardstock and wrap them around with some coordinating Baker's Twine. In my case, I used Platinum Shimmer and Blossom, together with a Silver Eye Pin.  Adhere to the bottom of your card using foam tape. You don't want to glue it on - as you want your recipient to be able to use it. 

scrapbooking beading embellishments

 Next, cut a piece of black cardstock into a 5cm x 9cm rectangle.  
Using the back of your craft knife, or a pair of closed scissors - score at 3cm and 3.5cm from both ends.  Fold as shown in the picture.  
I stamped my greeting at the bottom using Versamagic Starlight Silver .


scrapbooking beading embellishments

Then pierce 3 holes through the folds and place 3 charming pins in the holes to display them:

scrapbooking beading embellishments 

 Tape the two ends (or hot glue in my case) and adhere the pin display to the card.


Ta da - one "Gift" Card.


And now a gift tag made
with Strawberry Shortcake Sugar Beads


scrapbooking beading embellishments

Using an Inkessentials Black tag #8 - pop your tag through your Cuttlebug - using the flower embossing folder that comes free when you purchase a Cuttlebug 
(we do pre-orders for Cuttlebug Machines).

Add some Red flowers,
a Red and Silver Charming Pin,
some Metallic Cream Skeleton Leaves,
a Butterfly Charm,
and a Red Love Charming Word.
Tie a Red Glitter Ribbon and a Red Scalloped Edged Organza Ribbon though the hole in the top of the tag.

Paint your tag with some Claudine Hellmuth Multi-Medium.
When dry - spray with a Red Glimmer Mist (I used Marmalade which has an orange glimmer).

We also have 2 other "real" Red Glimmer Mists in stock - LED Red and It's Red.


scrapbooking beading embellishments

When dry, spray with Pearl Glimmer Mist.

scrapbooking beading embellishments

Next, heat emboss in random areas with Red Glitter Zing! ...


scrapbooking beading embellishments


and then, using Dimensional Magic as your glue - sprinkle Licorice Twist Sugar Beads randomly over the card.

scrapbooking beading embellishments

A light sprinkle in the centre of our Red Stemmed Flowers gives you a shimmery pollen effect ...

scrapbooking beading embellishments

and Sugar Beads adhere well to our Butterfly Charm (and of course all our other metal charms).

scrapbooking beading embellishments


And finally - another card!

This time with Strawberry Shortcake Sugar Beads as a flourish.


Start off with a Twiddleybitz C6 White card.
Apply some Fired Brick Distress Ink (using your ink blending tool) over a Twiddlebitz Bricks Template.

scrapbooking beading embellishments

Cut some scrap chipboard into a window and paint with Black Soot Crackle paint.
Add a piece of background paper (I used Kaisercraft Just Believe Snowflake,)
and coat in-between the window frames with Dimensional Magic .

I arranged all my embellishments on the card:
some Red Flowers,
an Antique Silver Leaf Charm,
some Black Rose Buds
and a Ladybird Pin.
 
Once happy with their placement,
 I drew flourishes with  Dimensional Magic 
and then sprinkled Strawberry Shortcake Sugar Beads.
Once dry, I adhered my flowers, charms etc

  
scrapbooking beading embellishments


scrapbooking beading embellishments


Hi everyone 
Geli here with
3 cards using the new my2angels sugar beads


love+cards+%281%29.JPG


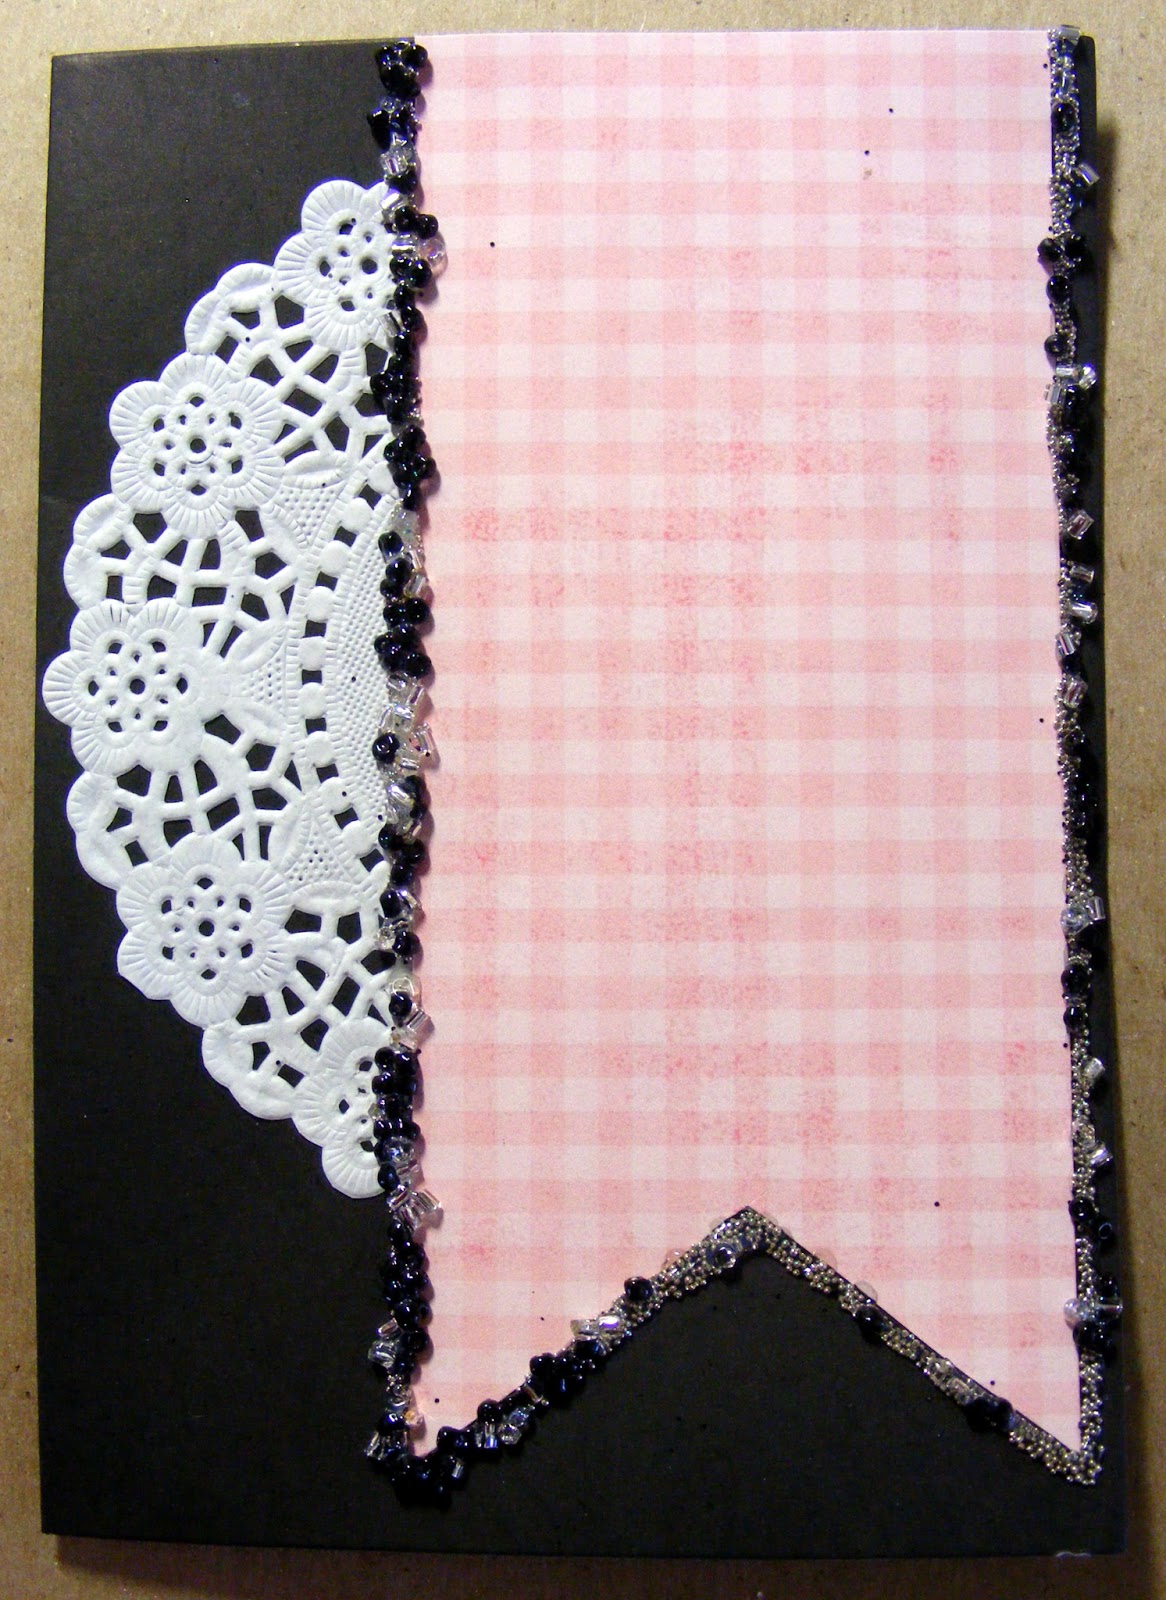
All 3 cards use the same basic fishtail banner (2 1/2 x 5 1/2"), a tag from the Bo-Bunny Enchanted Fairytales paper and a paper doily. 

The Sugar Beads certainly look delicious with beads, microbeads and cylinder beads all mixed together and they have yummy names too.

Here is how to make the first card:

love+cards+%286%29.JPG


Cutting a perfect fishtail banner is easy!
 

https://blogger.googleusercontent.com/img/b/R29vZ2xl/AVvXsEjFy4uBwxwjdrytlozD93aWJomhjinN03JKrrvpp4-wf-g82VmHQXtxUHQlBwUcyMNKuqwvgD3J7XntTHPgvnLY0xmmDAKFWeCqQQuQ_PtPrEzB15cP9cYI0Wj4mzEclU-lyUHh5u0jjQ/s1600/love+cards+%252817%2529.JPGlove+cards+%252816%2529.JPGlove+cards+%252815%2529.JPG


1. Cut halfway at whatever angle you want.


2. Fold it over so the corners meet.

3. Cut along the diagonal line.

Done! Perfectly matching every time. 

love+cards+%252814%2529.JPG


Glue a small paper doily under the banner. Trim off anything that sticks over the edge (except on the left).

love+cards+%252813%2529.JPG

 
Draw a line of Dimensional Magic around the banner and sprinkle the Licorice Twist Sugar Beads all over it.

love+cards+%252812%2529.JPG

 
Here's a closie. Good enough to eat:

https://blogger.googleusercontent.com/img/b/R29vZ2xl/AVvXsEjuvgSHITfH4g9-ctTRGN3BrheqkzBtxP_h5L1FoAQl_AMTwtcUsZn8DCDXDZu2tKET-2oJS2xfB30Kzcvb2_BuikMGrXhBa1WMLDivgfedE8UOPvLcahJ8R4Ttqo24ftAEcqGe6ogNkg/s1600/love+cards+%252811%2529.JPG

 
Now draw another line of Dimensional Magic on top of the beads to secure them nicely, especially if the card is being posted! 

love+cards+%25283%2529.JPG


Cut out a tag from the Bo-Bunny Enchanted Fairytales paper and embellish with a Black Love Charming word.


Here is another card, using the same basic layout, but this time it's the Strawberry Shortcake Sugar Beads

These ones are red and silver.

love+cards+%25287%2529.JPG


Cut out a tag and glue on some red stamens and some black scalloped edged organza ribbon.

love+cards+%25288%2529.JPG

Glue a wish ring onto a scrap of paper, cover the inside with Dimensional Magic, but let it dry before gluing it onto a black mulberry paper flower and then to the tag.


Add a few black rhinestuds and it's all done.


The last card starts off just like the other two...


love+cards+%25285%2529.JPG


...and is embellished with a silver brass filigree,
 a present charm,
 a red charming pin  
and some black stemmed star flowers.


I will show you in an upcoming post how to make them shiny in different colours, so keep an eye out for that:)


love+cards+%25284%2529.JPG


GELI