Friday, September 14, 2012

Christmas, all cherry and bright - and quick too

Christmas - all cheery and bright - and quick too

First of all, I can't believe that I am doing a Christmas post in September! But some of you like to get started early on cards and there are new Christmas papers at my2angels I want to show you. It  is the new Mint Twist range from Kaisercraft, perfect for those of us who prefer a bit of bright and cheery over muted and old fashioned.
All I had was a 1/2 sheet of this Mint Twist Jingle paper and I managed to get 3 cards out of that, plus a few embellies.

If you are in a hurry, you can cut out the tags from the paper and use them as they are, but I like to always add a bit to it.


For the first card I stamped leaves onto the tag to fill it out a little more and did some hand stitching with the Sew Easy tool and the Flourish head, plus 3 washi tape flags. 

 The Christmas bauble got a glass cabochon to make it 3D (use Dimensional Magic to glue it on) and 2 white bows.
The next card has a giant mulberry flower for a bit of background texture. I could have sprayed it with Glimmer Mist, but decided to leave it all white, so the cute tag will stand out. 

I made 3 different frames: 2 rows of sewing, a rhinestone chain and spots using Liquid Pearls.
 
 The sweet little pink present charming chain adds just enough wow factor. They come in different colours, too. I popped a little pink bow on top as the finishing touch. 

These bow packs are great for having a bunch of mini bows on hand whenever I need one.

The last card has 3 layered tags from the same Jingle paper.

  
and I finished it with some cotton lacered velvet ric racbaker's twine and a present charm with 2 small leaves. This card was really quick to make, because I was running out of time before school pick up. I reckon you could make 10 of them in an hour.

I hope you got some Christmas inspiration. It's always a good idea to start cards early, so that you don't run out of time.
Geli

Wednesday, September 12, 2012

Create an album with me - part 10

This is my last page for my Russian album and it's ready to be mailed off. There are lots of photos left, but they will go on a CD in a pocket at the end. 
This last page has a hidden photo, which is a great technique for private photos, or like in my case, really goofy ones. Simply pull on the tag...
  ...and another photo swings out:
This sort of photo happens when you wait around at a tiny deserted train station in the Urals....

First, you will need 2 photos in the same size and direction. Create a mat under the main photo to give your secret photo a place to hide. Mine is 3 1/2 x 9" and the flower strip is 1 1/4 x 12". I just used some of the leftover papers. 
 The 2 photos are attached at the top right corner (main photo) and the bottom right corner (hidden photo). Here is how it will look from the back.
 Put a strip of sticky tape along one side of the main photo, close to the edge and line up the hidden photo so it butts up against it. This will stop it from swinging out too far. 


Punch a hole through both photos for a brad. The brad needs to be fairly loose for maximum swinging action, so put 2 layers of scrap cardstock under the legs when you open them up and then remove the cardstock:
 Add a tag and you're ready to swing!
(I later sprayed the patterned paper with some white mist to tone down the colours a little)
 Now on to the background. This masking technique will work with any stamps you want to layer in different colours. First stamp a few random tags. Stamp 2 more on a post it note and cut them out carefully, just outside the edge. They will be your masks. 

 Stick them over 2 of the tags on the background... 

... and stamp over it with a background stamp in a contrasting colour. There are many wonderful background stamps to be found in the stamps section at my2angels and these distress inks work great for nice crisp images. 
 Peel the masks off and repeat all around the edge of the cardstock. 
Now you can add your photo mat, but be careful not to glue down the main photo on any part where the hidden photo needs to swing out from. In my case it meant leaving most of the left half of the photo and the mat glue-less. 
Now embellish with some leftover stickers, a guitar charm... 
 ... make some flags with leftover papers and some baker's twine... 

...and add a couple of star flowers. These ones have some pearlized mica fragments in the middle. 


Quick and easy. Why not give it a try sometime?

If you have missed the other 9 pages, here are the links:
part 5
 and ....

Our street

Remember the days when kids played on the street? When I was little, we lived on a very quiet street and  played there all the time. My kids aren't as lucky as we live on a busy road, on the other side of the world.

 Most of the flowers I used are available at my2angels:
giant white flower, which I embossed:

 rose buds and cherry blossoms (both available in several colours), mini mulberry leaves (available in white) and the dots are made with Liquid Pearls
 (Yes, it's mini me again.)

A bit of scrunched up muslin and some dry embossing:


The journalling says, "Yes, we had potholes and crummy Trabbi cars in our street, but this will always be home to me. Here we played ball games, elastics, hopscotch, stilts and roller skates.
GELI

Monday, September 10, 2012

More New Arrivals in store

More New Arrivals
in store now


Stampendous Embossing Enamels
(and restocks)


Stampendous Colour Fragments
Color Fragments are just that. Bits of pure color you can glue on to any surface with any adhesive. Or you could sprinkle into melting embossing powders for an amazing Encrusted Jewel look.
Also crush for smaller particles.


Glitter Glass
Stampendous glitter is made with the highest quality materials and comes in a wide range of colors and grades. Try mixing your own colors for a custom effect, or mix glitter with embossing powder for something really special. Apply glitter with a glue pen or any adhesive.


and a few up close cause I couldn't resist having a play with the new colour fragments and embossing enamels


The beginning of a Christmas card using Shabby Green Embossing Powder for my Christmas Trees with fresh green glitter glass & leaf green colour fragments sprinkled below the trees


Using Aged Silver Embossing for the background with Purple Colour Fragments. 


The belt for the dress is our silver filigree flower wrap and new purple aluminium flowers


Aged Bronze Embossing Enamel with our Antique Bronze Chain, Large Antique Bronze Key and Dark Brown Rose

This time using Black Embossing Enamel on the dress form then sprinkling Scarlet Colour Fragments over the embossing.

To finished off the dress I added 3 red roses on top of our new black scalloped ribbon


 Christmas Baubles

I showed the ladies in class yesterday how I created these baubles and thought you might like to see also.

Using the new Kaisercraft Turtle Dove Clear Stamps(the baubles) and stamping directly onto my card with emboss it and embossing with the new Marine Aged Embossing Enamel


Then stamping with the baubles again using Stazon Midnight Blue onto acetate.
Cut baubles out, bend them in half (lengthways) and using liquid glue (don't coat them fully you want to see some of the stamping behind) sprinkle over Marine Colour Fragments.


When fragments dry then adhere them on top of your embossed baubles and "hang" them with Gold Rhinestone Cup Chain


 so what else is new in store?


Steampunk and little boys...The Craftsman collection is calling all of those handsome and industrial photos you have in your stash. The Craftsman collection is full of deep color with masculine elements


and what we could get of Prima Romance Novel
half of our order was not received (:

Romance Novel is a line full of ephemera-like designs. 
Large florals grace the pages giving the line it's romantic feel, the elements in this line are perfect for creating mini albums...


Hope your week is a fun and creative one


Saturday, September 8, 2012

Easy Masculine ATC Set

Hi everyone, Michele here.

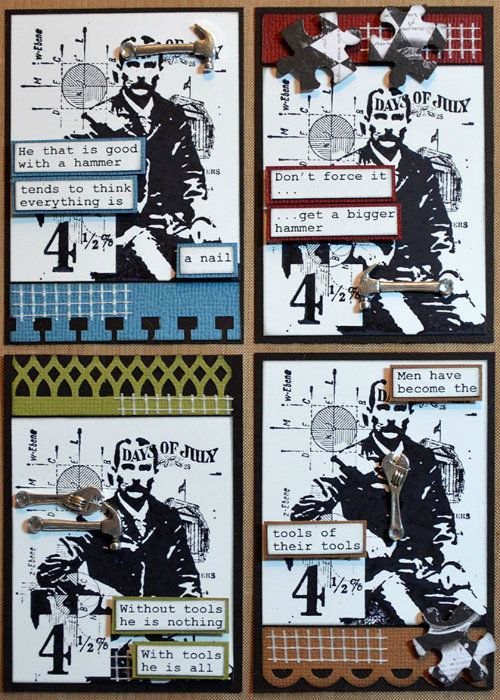
Today I have a step by step for you - a set of four, easy to make ATC's with a masculine theme.
The only rule you need to follow when making ATC's (Artist Trading Cards), is to make sure that they measure 3.5 x 2.5 inches. That's it. The rest is up to you and the way you feel on the day :)

If you are making your ATC's for a swap, you may want to make them all the same - that way everyone involved in the swap will get an identical piece of your art, but for me, making them for you to look at here on the blog, the best way seems to be to choose some common elements and then put them together in different ways. That is what I have done with these.

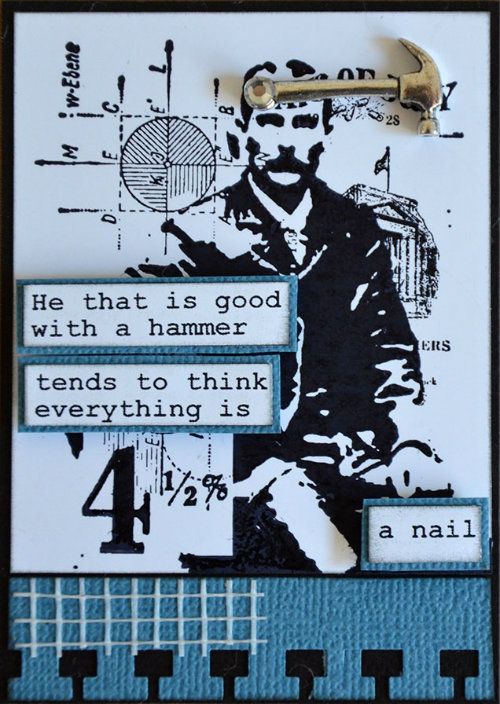
I decided to make my ATC's using the criteria of this month's challenge. Black, White, with one other colour. Most men have one thing in common....they love to go to hardware stores and look at tools!! So I had a look in my stash and chose a few things ''toolish'' to use.


I chose to use four Inkssentials ATC's Black Surfaces. Tracy has these in White, White Gloss and Kraft as well and because they are exactly the right size, they save heaps of time measuring and cutting. Obviously these Hammer and  Spanner/Wrench Charms were also the perfect final decoration for each ATC as well.

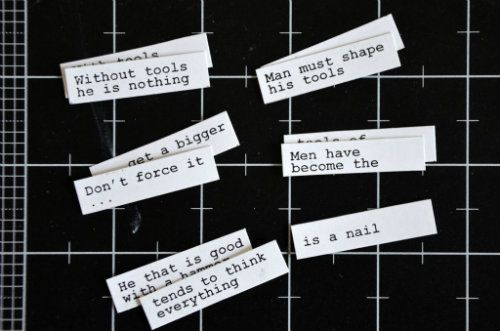
Next I consulted Google - ''Quotes about tools'' - and picked up four interesting quotes from various people about tools and those who use them. There are not many, but I managed to find enough for my set of four :)


I printed them on some glossy, Ranger Specialty Stamping paper and cut them into strips.

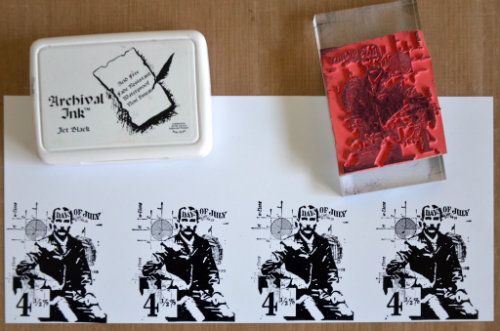
Then I went looking for a masculine stamp in my stash and came up with this one. Just quietly, it's the only ''Man'' stamp I have! Might need to do some shopping :)


I stamped it four times on the same sheet of Stamping paper with Jet Black Archival Ink (oos). This needed quite a bit of drying time to avoid smudging, so while I waited I started on the ''one other colour''. There is such a tiny bit of colour on each ATC that I was able to use some small offcuts from past projects for all of my colours. ATC's are also fantastic for using up your left-overs!


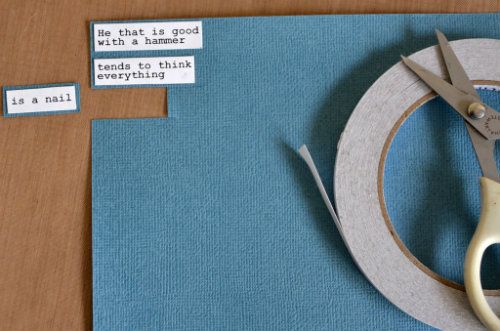
First, I inked the edges of my quote pieces with Black Soot Distress Ink and then mounted them on cardstock using X-Press It 6mm Double Sided Tape. I cut out each strip, leaving a very thin, coloured border - about 1mm wide.

Because my stamped image is about half an inch shorter than the necessary 3.5'', I also cut a strip of coloured cardstock to fill the space.


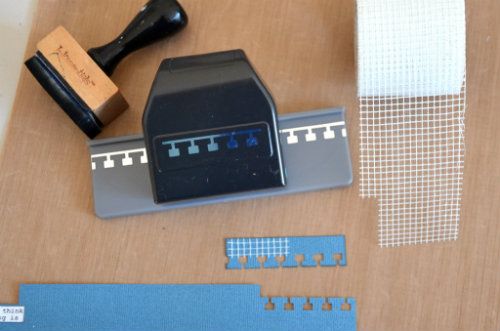
This I punched, inked with Black Soot and embellished with a tiny piece of Plasterer's mesh. I got this small roll from a friend who is in the trade, but you can also get it at any hardware store. It's slightly tacky on one side and is great for adding texture and interest.

When all my components were ready, I put them together like this:


The stamped image and the cardstock are stuck with X-Press It 6mm Double Sided Tape, the quote is popped up on Dimensional squares and the hammer is stuck on using a tiny bit of Glossy Accents. A 4mm Silver Rhinestone covers the hole in the Hammer Charm.

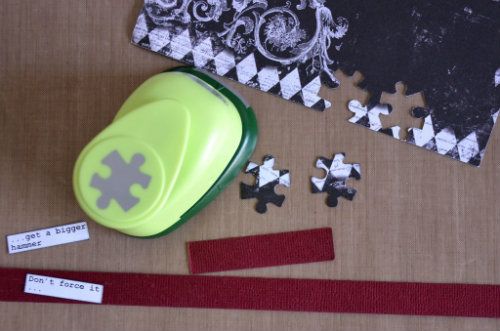
The next piece of scrap card I used was a deep wine red.


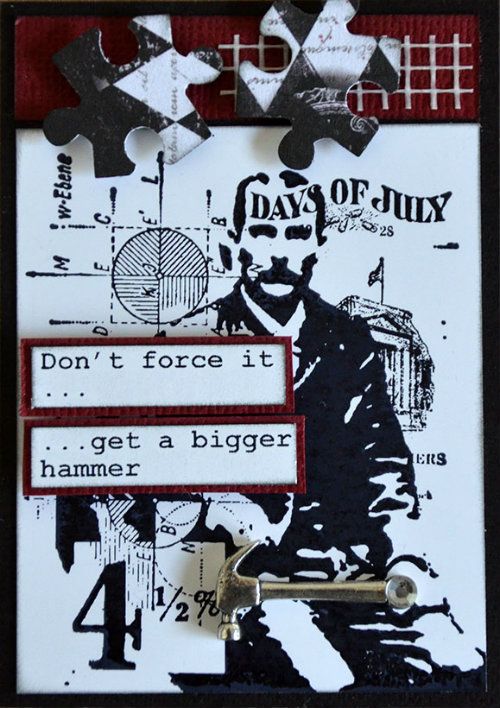
I mounted my quote in exactly the same way, and cut the extra space filling strip. This time, instead of punching the edge of this, I left it whole. The quote I chose for this one amused me and reminded me of the way my family behaves when putting together a jigsaw puzzle, so I  punched two jigsaw pieces to add to it. For this I used some leftover pieces of Bo Bunny's Enchanted collection - all Black and White and the perfect papers for this challenge.

The second ATC went together like this:


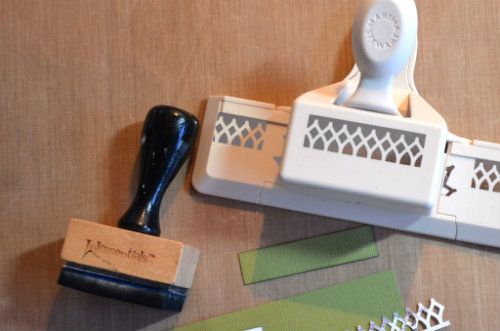
I chose a light olive green base for the next one.


I had intended to use a piece of punched paper - again the Bo Bunny Enchanted - over the space filling cardstock, but in the end I was not happy with the way it looked. I left it off, punched the cardstock instead and created this:


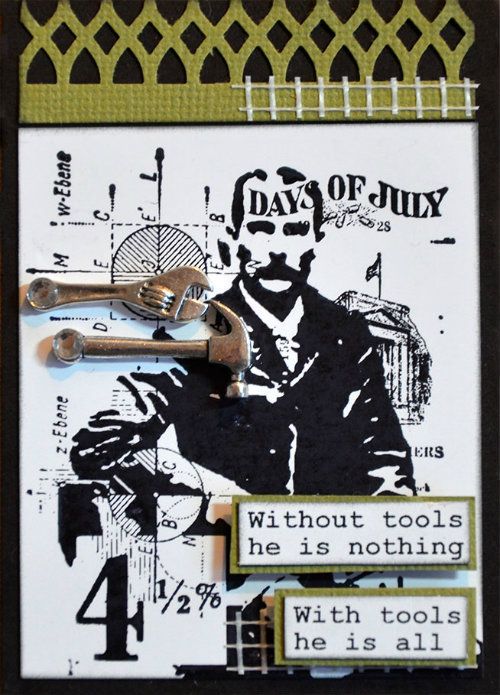
I thought the Hammer and the Spanner/Wrench looked good together on this one.

The last card has a caramel brown cardstock for its ''other'' colour.


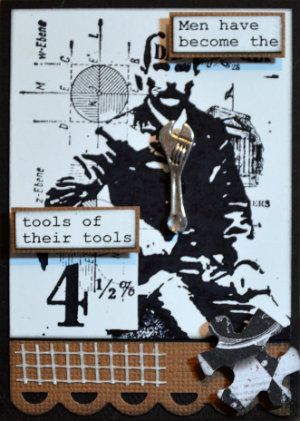
Not a very good photo...sorry! But you get the idea I'm sure! The resulting ATC looks like this:


I added another puzzle piece and of course the Spanner/Wrench charm.


So none of my ATC's are exactly the same, but all fulfill the criteria for this month's challenge and all use products available at my2angels. :)

Together they make a cohesive set for keeping or swapping. Individually, you can use them as embellishments in mini albums or on your layouts.

Happy scrapping! Michele