Morning ladies
Heather here
here are some more creations to showcase the charming chains
and the sensational new "TILE" release
I created this card and added the "antique bronze tile "
and I also included the little " locket chain "
some close ups
I adore this TILE and there are others over at
my2angels
below is the antique bronze locket with key charm
this TAG is showcasing another of the charming chains
Antique Bronze Cream Rose Charming Chain
don't you just love these ????
they look even better in real life
love and hugz
Heather x
Happy Monday Ladies!
Jess here
I must admit I'm rather enjoying this girly layout thing.....so much so that I have another one to share!
My my2angels
stash doesn't seem to be getting any smaller......in fact I thinks it's
getting bigger......Darn you Tracy for getting in gorgeous new stock
all the time!!!
I've used the delightful Basic Grey - Kissing Booth range again.....I really love it! I made my own mist by mixing a few drops of Tea Dye Reinker & a little water in a Inkssentials Mini Mister. I used a doily as a mask and sprayed over it. All the stitching on the layout is done by separating the red from the white twine (Maraschino Bakers Twine), and stitching with the red twine.....I like the texture of it better than the usual old dmc thread!
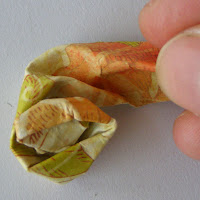
Now, because I like to do things the hard way.....I made the "rosette"
by cutting strips of paper, punched strips with a border punch, took a
century and a half to score lines on the strips, folded then stuck
together, then inked around the edge with Tea Dye Distress Ink. To save yourself the effort (and you're sanity) you could also use a Tim Holtz Rosette Die.
If you do not have a die machine, just ask Tracy to cut a couple of
strips of whatever paper you've purchased and she will happily
oblige.....honest!!! I've also Layered a Kraft Tag # 5 and a piece of a White Scalloped Edge Felt Frame.
I'm digging using lot's of flowers....good times......good times....
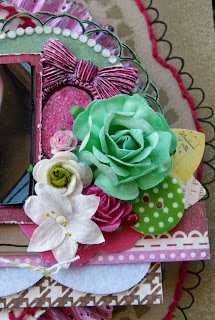
Here I have used a Large Green Rose, a Hot Pink 2cm Rose, A 2cm Rose from the Mixed Green Rose Pack , White Lilly, a Pink Rose, a Green and White Spotted Acrylic Button & some Red Pearls.
I've painted a Scrapware Doily Frame with a Paint Dabber - Snow Cap White, which I also swiped over the Self Adhesive Rhinestone Circle that I stuck to the frame. After that was dry I then went over it with Distress Stain - Peeled Paint.
I've altered a Silver Oval Frame with Bow Charm by painting it with my trusty Paint Dabber - Snow White, then painting over with Glimmer Glaze - Paradise pink then added some detail with a black pen.
Here I've Layered a Red and White Spotted Acrylic Button, a Pink Rose & a Black Bird on a Swing Charm, which I've painted with my Paint Dabber - Snow White then painted again with Glimmer Glaze - Cowboy. I've tied the charm with some Green and White Baker's Twine.
The Alphas I've used are Foam Thickers - Daiquiri Green & Webster's Pages Alpha Stickers.
Love and Peace xox
JESS


