


Hi Susan
here. My friend Jet (Jeanette) and I had
fun playing with different felt products.
You thought
vinegar had many uses, see what Jet and I came up with for different ways to
use felt. OK I admit not as many as
vinegar but much more fun.
Technique 1 – Felt as is
Love you to the Moon and Back - Designed by Jet

My girlfriend
loves pink and is having a hard time, so it was easy to make this card for her.
Cut dark
pink cardstock 15 x 30cm and fold to make card base. Matt with white cardstock
at 14.5 x 14.5cm.
Next cut
pale pink cardstock to 14 x 14cm, stick Pink
Stars and Scrolls Felt Ribbon down the left and side of card
and then matt to card base.
Using
Spellbinders Nestabilities Stars I cut two stars using the dark and light pink,
adhere to card.
Adhere Love
You To The Moon And Back Silver Key to the
stars.
Adhere Metal
Textured Stars Dark Pink to some of the Pink
Stars and Scrolls Felt Ribbon to highlight the stars and tie
in the Love
You To The Moon And Back Silver Key. Finally
add a single Metal
Textured Stars Dark Pink in the bottom right hand corner to balance the card.
Technique 2 – Felt in a Strip
Butterfly Birthday Card - Designed by Susan

Do you have
some felt but does not match what you are making? Simple just cut out the parts that you want
to use. For example this Black
Christmas Tree & Scroll Felt Ribbon while great at Christmas; I needed
something for a birthday card. Actually
all I needed was the
scroll:
I cut out
the scroll part of the felt. Don’t worry about the Christmas tree; I will cover that
with a flower.
 |
 |

.jpg)
Stamp a
butterfly onto a white circle and stamp another and cut out to add dimension to
the first butterfly.

Mount black and white card onto a white base.

Die cut out some circles in black and white and mount the stamped butterfly.

Adhere the black felt strip down the side of the card. Cut off excess felt.


Adhere the
flower and other butterflies and stamp "happy birthday".
Thoughts for You Tag - Designed by Jet
Wanting to
use a little more of Pink Stars and Scrolls Felt Ribbon but
in a different way, I decided to whip up a quick and easy tag.


Firstly I die cut a tag out of dark pink cardstock using Sizzix, Tim Holtz Alterations, Tag and Bookplates die. Then cut another tag from white cardstock and trim down on the edges and distress.
 Then die cut two shapes from Spellbinders, Nestabilities, Scalloped Circles, using the dark pink and white cardstock again. I glued some Tim Holtz Distress Glitter, Clear Rock Candy over most of the circle, to form a base for later.
Using four x 15cm lengths of Girlfriends Ribbon I used some double sided tape and made simple loops. Then I taped them together to form a flower.
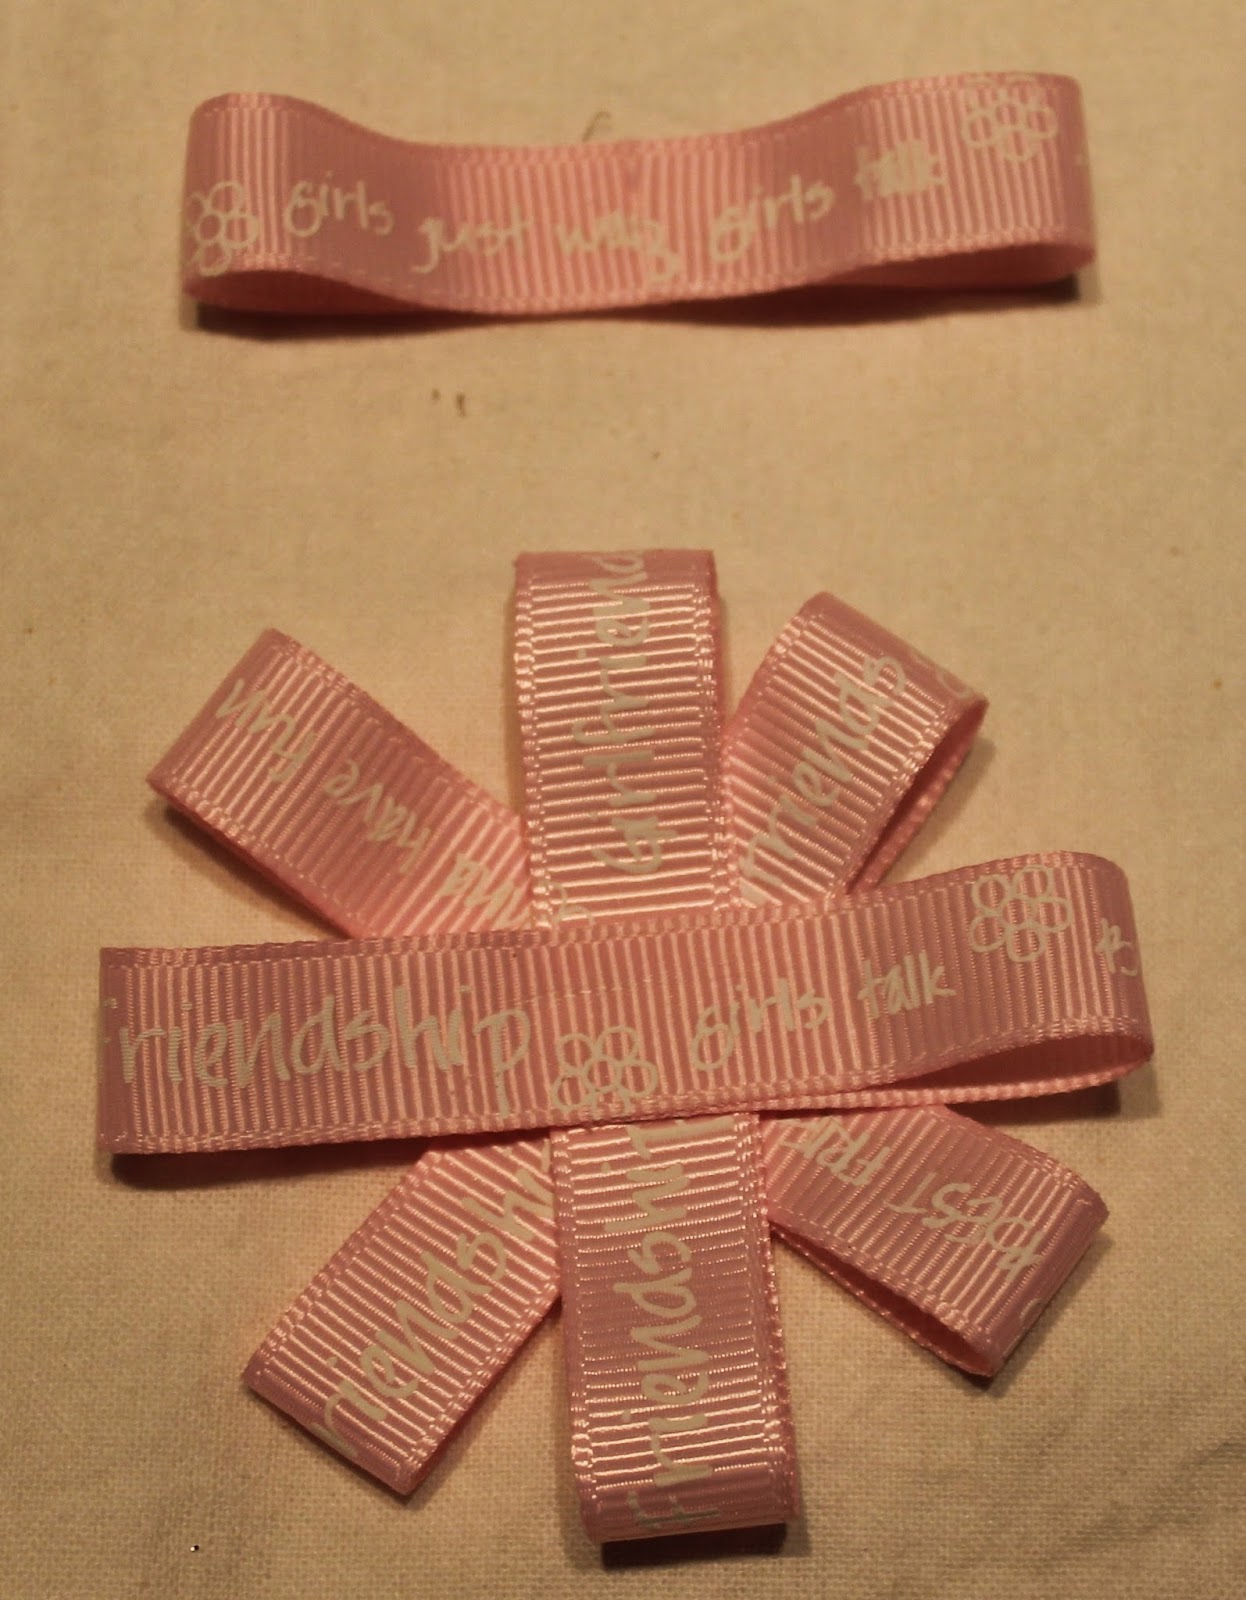
Cut a piece of the Pink Stars and Scrolls Felt Ribbon to get a scroll pattern.


Adhere the
white tag to the pink tag, adhere the pink circle. Adhere the ribbon loop
flower towards the top of the tag.

Adhere a
layer of seed beads to the scalloped circle. Once dry, adhere another layer in
the centre of the beads, to make a raised centre. Knot some Bakers Twine Blossom Light Pink And
White to a Dragonfly Silver Charms and
adhere to dry bead centre. Once dry, adhere to centre of the flower.

Adhere a
single seed bead to Friends Charms
and let dry. Stamp the sentiment of “thoughts for you”. Stick down the scroll from Pink Stars and Scrolls Felt Ribbon.
Knot some Bakers Twine Blossom Light Pink And
White to Friends Charms and
adhere in the corner.
Finally, loop through some Girlfriends Ribbon to finish of your tag.
Enjoy!
Technique 3 – Felt as a Stencil
Mother’s Treasure Canvas - Designed by Susan

 Another way to use the
Felt Ribbon is to
use it as a stencil. With this canvas I
cut three (3) strips of the White
Stars and Scrolls Felt Ribbon and placed on top of the canvas. Do not adhere to canvas as you need to remove
it.
Another way to use the
Felt Ribbon is to
use it as a stencil. With this canvas I
cut three (3) strips of the White
Stars and Scrolls Felt Ribbon and placed on top of the canvas. Do not adhere to canvas as you need to remove
it.

Remove the felt ribbon and you are left the stencilled pattern background. Put aside to dry or if you are impatient like me you, can use a heat gun to dry.
 Next I matted the canvas with several layers of black, pink and white card. Note: I micro-matted the black card (bottom layer of the matting). I also micro matted the photo to black card. Micro matting is making a very thin border.
Once the matting and photo are place, adhere the pink pearl
garland to the canvas.
Adhere the pink rose buds in place. 

I adhered the Antique Silver Leaf Charms in place with silicon glue
(eg Scrap Dots). Using a big glob of silicon glue, I adhered the pink roses/flowers and white roses in place.

As the glimmer mist has a shimmer finish, I
also added some glimmer mist to the paper flowers to bring in the "shimmer"
elsewhere.

Lastly I adhered the Cap
It
"Pink" - Mother's Treasure to the canvas.
All finished ......
But don't forget to use the coloured felt ribbon on another project or use a stencil again and again.

Technique 4 - Felt Shapes
Jet ventured into the world of Felt Shapes and other wonderful pieces from my2angels to create this stunning layout.
Mother’s Love Scrapbooking Page - Designed by Jet
With Mother’s Day coming up, I wanted to celebrate the love I have for
my sons, so, obviously I wanted to scrapbook as soon as I saw
Filigree Wishes “I Believe” pink.
I wanted to use the pink as it’s my favourite colour and I didn’t want a little detail like I only had boys get in the way, lol.
Filigree Wishes “I Believe” pink.
I wanted to use the pink as it’s my favourite colour and I didn’t want a little detail like I only had boys get in the way, lol.


Next I die cut a Sizzix, Tim Holtz Alterations, Styled Labels
to mount my Filigree Wishes “I Believe” pink
to.

The photos are matted on pale blue, white, kraft and black cardstock,
not your usual combination for babies, but I was celebrating my love for the
boys and was after a bit of a “pop”.

I cut a Rosette from Sizzix, Tim Holtz Alterations, Paper
Rosette in the pale blue cardstock.
A great, quick way to assemble the rosette is the fold it up, glue it into it’s circle, put down some hot glue on your non-stick craft mat, place the rosette over, pulling it into shape and pop the centre piece on top. All done!


Taking a butterfly from 18 Mulberry Paper Butterflies and
Flower White Mix, I brushed some Tim Holtz Distress Ink, Broken China
over the outside edge of the wings and then misted with Perfect Pearls Mist to
blend and soften the ink as well as tying it in to my “shiny” pale blue cardstock.


.JPG)
Sizzix, Tim Holtz Alterations, Vintage Market was the die I used for my title of “My Boys”, which also nicely tied into the font of “Post Card” on my paper. I added some flowers to my label at the top to help anchor it to the page.
I then added flowers (some pink to tie in my Filigree Wishes “I Believe” pink),
my rosette, a White Scroll Felt Hearts, 18 Mulberry Paper Butterflies and
Flower White Mix, White Pearl Garland made
into loops and straight “stems”.

To continue tying in the fact my pale blue cardstock was shiny I used an
Iridescent Medium to dry brush over the edges of my flowers.

I added a strip of stickles to my butterfly’s body.

Finally, I stamped my boys names at the bottom and how could I finish my
page without adding a charm??? I used Made With Love Envelopes tucked into the bottom of my arrangement.
Hope these have given you a few ideas of using my2angels felt ribbons and shapes ... dont' forget they are all half price at the moment
PLUS every $10.00 you spend before the 10th May puts you in the draw to win a Cuttlebug


.jpg)
.jpg)
.jpg)
.jpg)


.jpg)


.jpg)
.jpg)




 Posts
Posts


