Monday, June 10, 2013

True Romance Double layout

Hi Ladies,

Ngaire here. 

I don't do doubles all that often - about as often as I do multi-photo layouts - so it makes a nice change to work on a multi-photo double layout. There has been a lot going on over the past few months and I've not had much time to scrap and I am doubly pleased to get something finally completed.

The range is one of the two new Kaiser ranges for June - True Romance - and it is a sweet and pretty range, just perfect for feminine, shabby chic style layouts. The dominant shades in the range are pale blues, greens and pink - with a slighter darker reddish pink for contrast. Themes in the range include some gorgeous pink roses; birds with their cages; and lots of lovely luggage tags. All very girly and pretty.

For the base of 'Cherish Life's Moments' I used the reverse side of the Affection paper - but I cut it out as a frame, so that I could use the smaller piece as well. Over this went a slightly smaller piece of the reverse side of Faithful and then over this went the cut-out bit of Affection. I really like the old-fashioned script you can see on this paper and being a background pattern, you can pile heaps of other things over it without missing out on anything really pretty.

I distressed all the paper edges and inked only the base paper. Rather than use other paper layers, to embellish the page I added a paper doily and some hand cut roses/tags. The larger of the two tags comes from the Desire patterned paper. The hand cut title letters on it are from the First Sight  paper.

The fussy nature of the hand cut flowers/doily make the layout look a little busy - so I kept other embellishments to a minimum.

IMG_5639

I love these filigree edges - the Twiddlybitz Wrought Iron Mantle - it's so easy to pop them alongside a photo to make an interesting border piece. This one has been inked with several layers of ink to get that lovely mottled pattern. The first layer was a mid-dark grey ink. Over that went a layer of white - but very sparingly - and then random bits of white ink dabbed here and there. You end up with a variety of greys and some white splotches - all very chic and shabby.

Over the top I popped some hand cut roses from the Adore paper and the daughter charm from the Daughter Pink Charming Rose Chain. I embossed the charm (and all the other bronze charms on the layout) with some Stampendous Aged Embossing Enamel Ivory - but I need to make a note not to do this again with the 'text' still inside the charm. :( Obviously the glue didn't like being heated - oh well, you learn as  you go.) The cream pearl is part of the Cream and Antique Bronze Keys Charming Chain set - I've used the rest elsewhere on the layout.

IMG_5634

In the top right-hand corner of the layout is the rest of the Daughter Pink Charming Rose Chain set. I've curled over a bit of the top paper edge and tucked some more hand cut flowers from the Adore paper underneath the edge - just to fill this empty bit of corner.

IMG_5638

I like to layer other embellishments on my chipboard pieces - here I've added some more hand cut flowers and the rest of the Cream and Antique Bronze Keys Charming Chain set- to the Twiddleybitz Eiffel Tower . Like the other chipboard pieces on the layout (the exception being the title) the Eiffel Tower has been given the grey/white inking treatment.
The Twiddleybitz chipboard title - Life's Moments - has been treated with Stampendous Aged Embossing Enamel Ivory embossing powder - which gives it a lovely creamy white colour with gold flecks through it.

IMG_5630

Underneath the photo I added in a Large Antique Bronze Key charm and one of the tag pieces from the Perforated Tags Sweetheart patterned paper.

IMG_5633

The second page of the double showcases Madame's (current) outfit. It's a very pretty, feminine tulle skirt and crocheted top from an Australian company called Dollcake.

I've used the same basic patterned paper arrangement as for the left side of the double and kept to roughly the same elements.
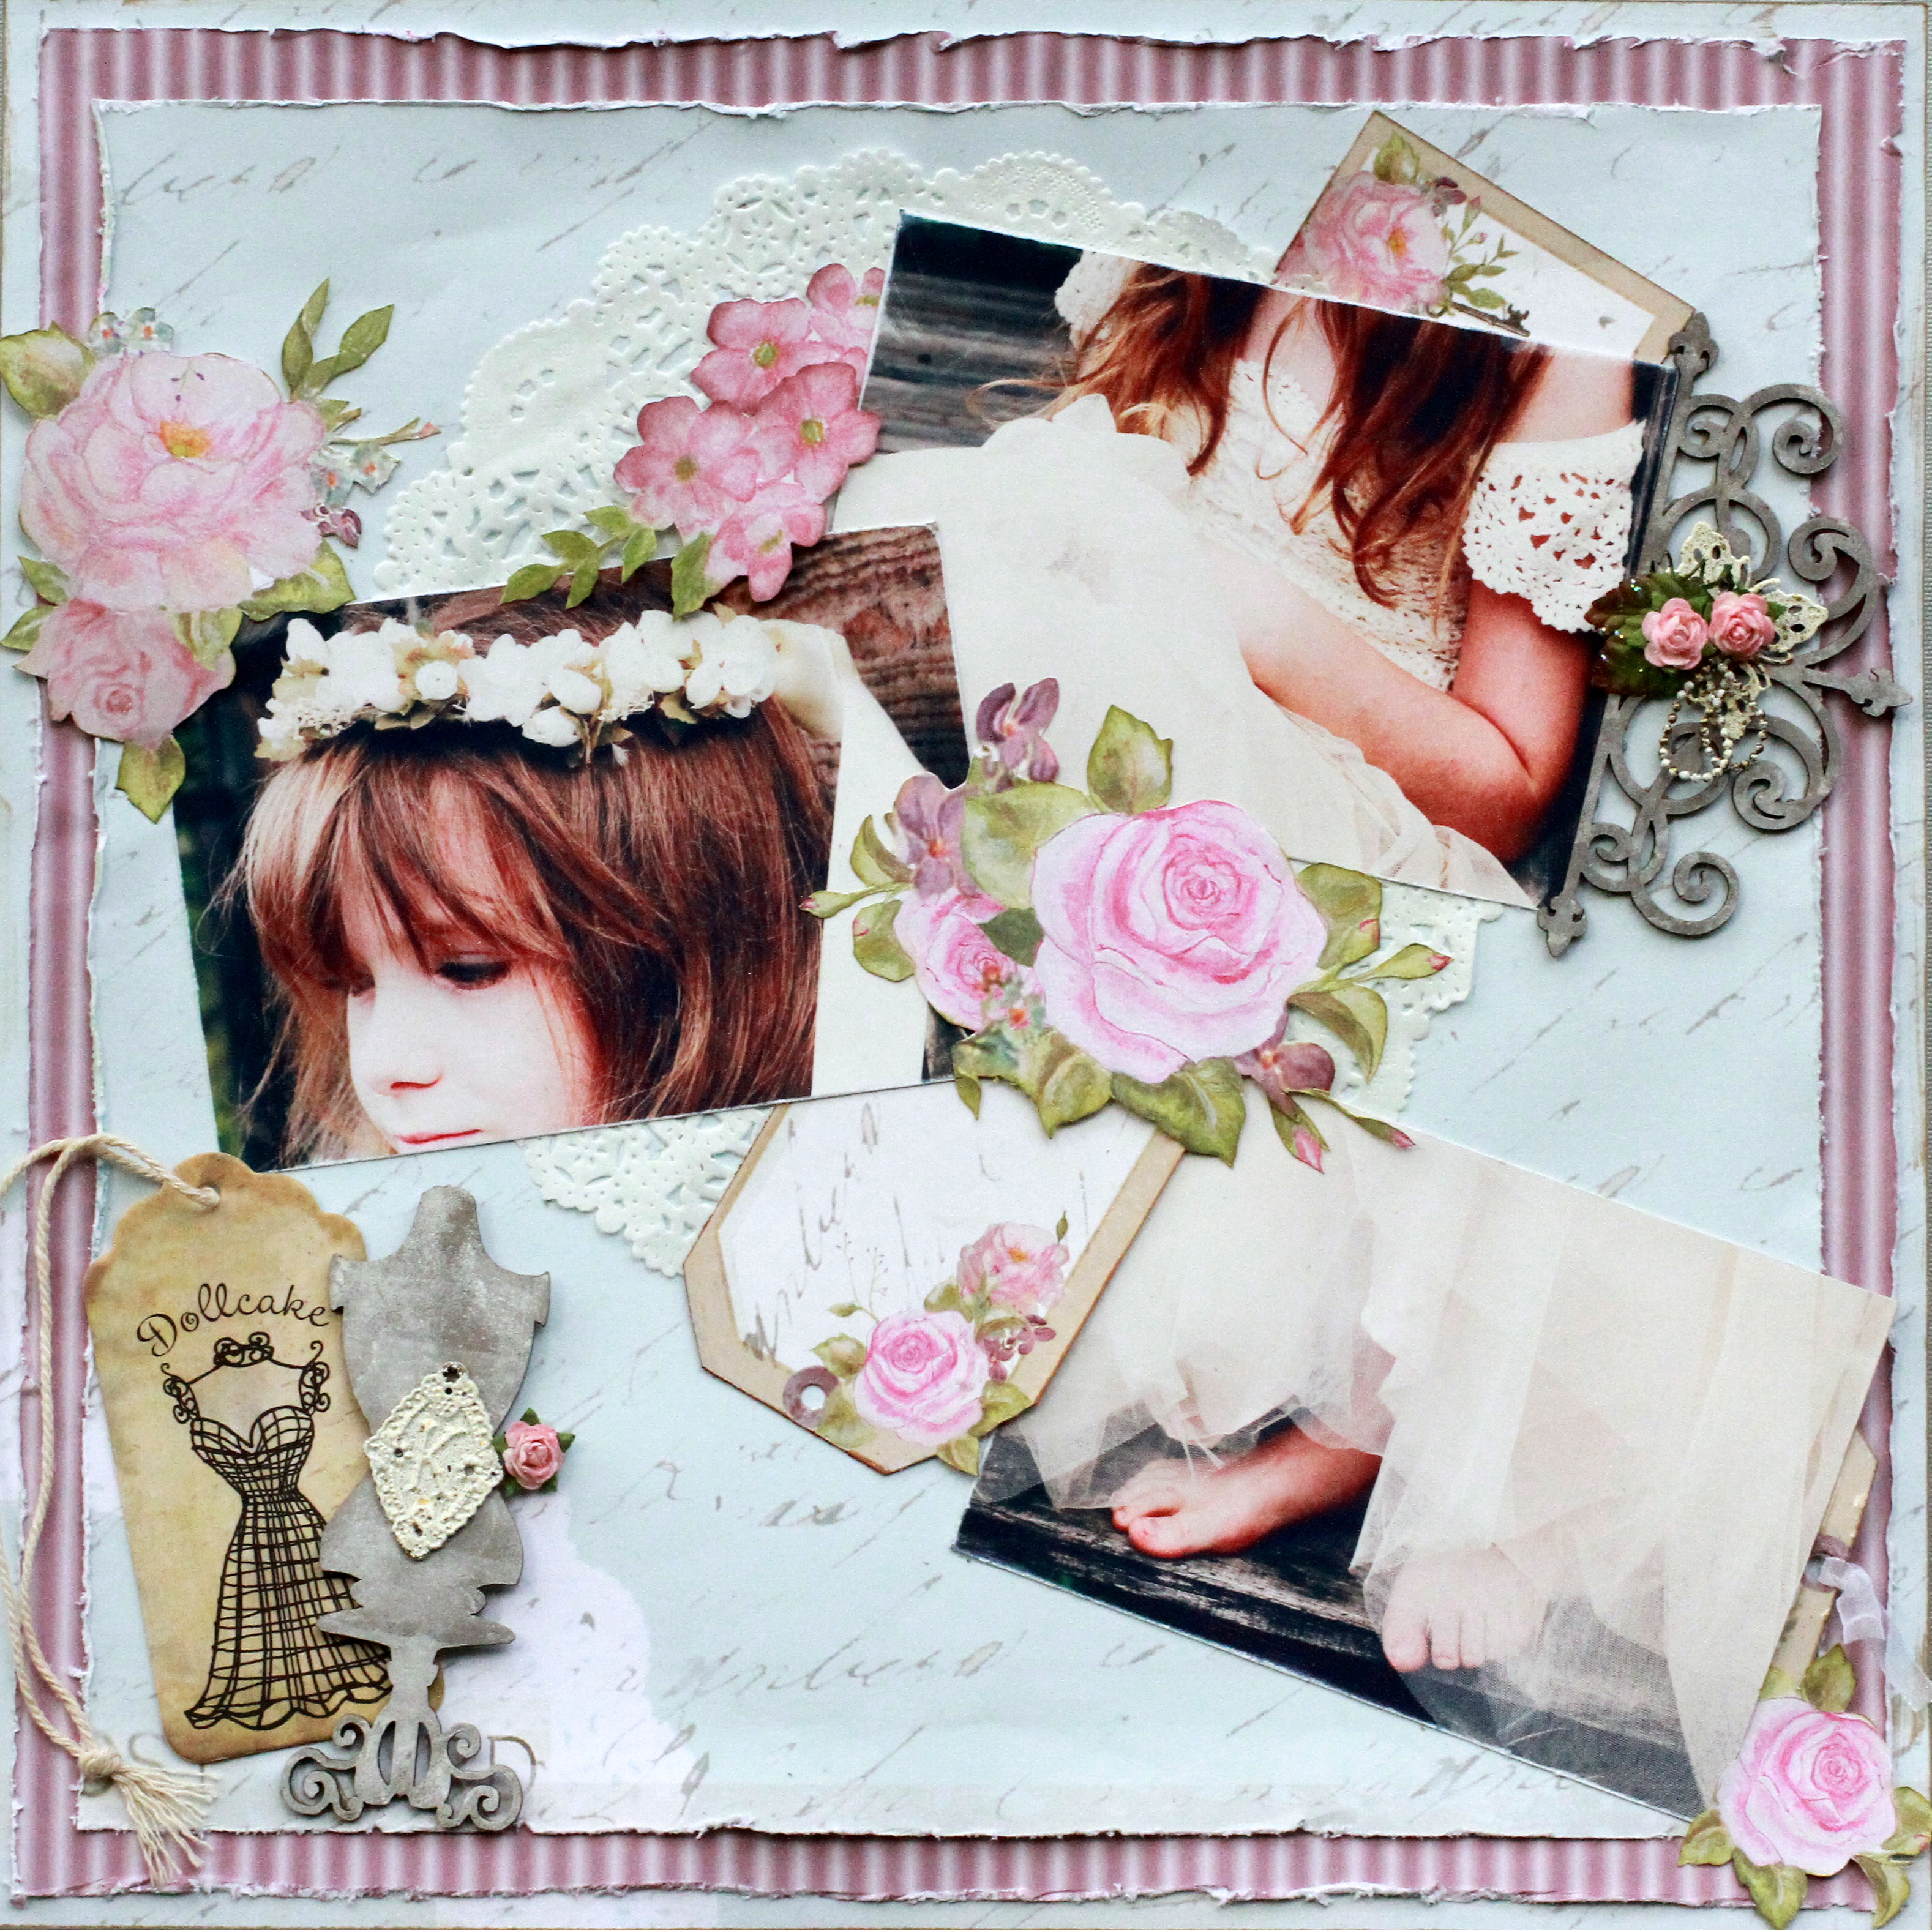
IMG_5628

The filigree work on this Twiddlybitz Wrought Iron Mantle is a nice match for the crochet work on the top. The top was the inspiration for using the doily as well. The roses and charm embellishment is one I made up myself from various left-overs. It came up rather nice I think - and I can see myself making a few more.

IMG_5621

All of the hand cut flowers come from the Adore paper and the two tags are again from the Perforated Tags Sweetheart patterned paper. I trimmed off the perforated bits and inked the edges to hide that they were once perforated.

IMG_5625

The final elements in the layout are the gorgeous tag that came with the skirt/top and in keeping with the dress theme - I added in one of the Twiddleybitz  Vintage Miss Mannequins. They come in a set of three - this is one of the plain designs. The "K" bronze charm is from my stash, but the rose next to it is one of the 'left-overs' I used to make my other embellishment.

IMG_5624

So there you have it - my first layout in several months - and a pretty feast of girly sweetness.

 Check out my2angels for the Twiddleybitz chipboard, True Romance papers and bronze charms I've used and have some fun making your own shabby chic creation.

Ngaire

Friday, June 7, 2013

Scrapbook and Papercraft Expo weekend

Please bear with us over the next few days whilst we are attending the Scrapbook and Papercraft Expo in Brisbane. 


Due to the volume of off-line sales at the Show, some stock may show up as ‘in stock’ when it is not. For this reason (and due to the huge demands attending the show makes on all our staff) we apologise that no online orders will be processed over the long weekend. 


We will do our best to get paid online orders attended to as soon as possible, with the intention of getting them posted on the Tuesday. 


Where online orders contain stock is sold out, we will advise you of this for your choice of replacement stock or refund. We thank you for all your support during this very busy time. 


If you are attending the show, pop in and see us at Stand 40

Happy long weekend everyone


Thursday, June 6, 2013

G45 Secret Garden - two Tags

Hi Ladies, Michele back again :)

I like to tie a pretty tag to a gift sometimes as an alternative to a card - especially if the gift is not meant for a special occasion - like a bottle of wine taken along to a dinner in somebody's home or a random ''thank you''. 

Graphic 45 patterned papers are great for this - they have so many interesting elements you can layer to create a little piece of gorgeous. I was playing with Secret Garden over the weekend and came up with two tags....Both tags were first covered with ''Seed Fairy'', inked with Spun Sugar, Victorian Velvet and Vintage Photo Distress Inks and the bottoms were die cut.


The first one features a piece of frayed muslin topped with a pretty rose from ''Springtime''  mounted on some dimensional tape. The same rose, only much smaller, from ''Seed Fairy'' is mounted on more dimensional tape on top of that. Both have had their edges distressed and inked. 


The details....A pink pearl flourish from my old Prima stash, various ribbons, including Pink Organza, a Deep Pink Rose Wooden Button and a Pink and Silver Love Charming Word.


The second one was just as simple. A panel cut from ''May Flowers'' mounted on Dimensional Tape over a piece of white tulle. I added a Pink and Silver Charming Chain, using a tiny brad to attach it and some fussy cut blossoms from ''Leafy Treetops''.

 A tiny Light Pink Rose pink rose beside a small ''With Love'' sticker and a small frame from  the Secret Garden Sticker Sheet were added to the bottom .

 All these extra elements are popped up on dimensional tape to add depth and texture.


I hope you are all enjoying Secret Garden from Graphic 45....there are a few out of stock items so I think you must be!!

Michele


Tuesday, June 4, 2013

A ''Cheeky'' Miss Empire Layout

Hi ladies, Michele here again with another layout from Kaiser's new Miss Empire Collection - this time one for the boys...

''Cheeky'', in contrast to my last layout using this collection, uses the masculine side of the double sided papers and as you can see gives you a completely different look.

Kaisercraft Miss Empire
The base is a sheet of spotty  'Ancestry' followed by a lightly trimmed and heavily distressed and inked 'Supremacy'. I used both Antique Linen and Black Soot Distress inks to get the grunge happening, and I also inked all the other pieces of patterned paper I used with this combination.

Also adding interest to this background with it's fun formulas and  drawings is an Antique Linen inked numbers stencil which is almost totally covered by embellishments, some white gesso pushed through the Twiddleybitz Narrow Arrow Template and a spattering of Tattered Angels Bash Glimmermist. Some of the larger splashes I blew with a straw to create the spidery look.

Kaisercraft Miss Empire

I mounted my photo on three pieces of  'Dynasty' and added a pair of black paperclips. Underneath these I tucked two strips of 'Domain', one from the orange side and the other from the brown reverse. The other tiny strips of spotted paper are the Manufacturer's strip and some thin paper strips from 'Steampunk'. The laced up paper has the addition of some Tim Holtz Mini Fasteners to the eyelets.

Kaisercraft Miss Empire


My large Paper Rosette (oos) is made from another strip of 'Steampunk'.Restock of the rosette die is arriving mid June

At the top and the bottom of the photo there is some Tim Holtz Ideaology Ruler Ribbon and the pointing fingers are from the Miss Empire Collections Pack.

Kaisercraft Miss Empire

The embellishments are simple on this one. Firstly, Glass Cabochons. These come in a variety of sizes, and are absolutely awesome. You can use them as they are, or add them as I have to die cut pieces from the Collections Pack, stickers or small circles of patterned paper to create unique additions to your layout. Tucked under my Rosette is an Antique Bronze Steampunk Cogs charm. I have also added some cogs, both bronze and wooden, some of which are coloured using a Black Soot Distress Marker. 

My 'Warning Boys at Play' pin has been inked, splashed with green Bash Glimmermist and covered with Crackle Accents. It's out of stock right now, but I love this stuff so will plead with Tracy to get some more ;) 

Kaisercraft Miss Empire

Finally, in the top corner making ALL the difference is a brand new my2angels Grunge Charming Dates bottlecap - the cog inside it matches the other cogs...PERFECTLY!!

I'm definitely going to get more of this collection...it's very versatile and I'll need more of it to go with the two lovely die cut papers I haven't used yet. 

Michele

Sunday, June 2, 2013

Kaisercraft Blast off cards and layouts galore

Every boy needs a monster / alien or two! 

And the new Kaisercraft "Blast Off" collection is absolutely perfect for the big or little boy in your life. The colours are funky and bright, in orange, green and blues and the little aliens are adorable. 

I had a bit of a play with the papers and collectables. With bright colours like these and chunky designs it's best to keep it simple and let the little monsters shine.

blast+off+collection+(1).JPG

(No, it's not a spelling mistake, it's German and it means - tada- knee monster. Sounds just like the English version, except you hear the k.)

blast+off+collection+(4a).jpg

"You have saved our lives, we are eternally grateful..."

Find the blue velvet ribbon here.
If you want to make a knee monster too, here is a link to a how-to blog post.


You will find it impossible to resist making cards with these cute collectables. I whipped up 3 in no time:

blast+off+collection+(5).JPG

This one is a get-well card with a twirling "germ":

blast+off+collection+%25288%2529.JPG

Here is goes, round and round...

blast+off+collection+(7).JPGblast+off+collection+%25286%2529.JPG

You can find step-by-step instructions on how to make a twirling card in this post here. It's super easy. Add some "nose drips" with Liquid Pearls. Yuck. Perfect for flu season.

The next card has a rocket blasting off!

blast+off+collection+%25289%2529JPG

Simply curl some craft wire around a pen and attach one end under the rocket, the other under the round tag. So simple and it looks great!

blast+off+collection+%252810%2529.JPG

The puffy metallic stars (I just love them!) are available here and the star charm here. Baker's twine is here, the most versatile product in the world! If you haven't got any, get back to Earth and grab some.

This little critter is just too cute. I added a googly eye and some feathers, just to make him even more awesome. If you don't know any little boys, give the card to a friend who's been a stranger lately.

blast+off+collection+%252811%2529.JPG

To make a card like this, cut a piece of blue cardstock to 12x5" and score at 4", 8" and 10". Fold like a flight of stairs and decorate with more stuff from the full-to-the-brim collectables pack, some ribbon and some more puffy stars, this time in blue. They're only $1.00 for 10, you'll want them in black and pink too.

Now if the boys in your life are all grown up and hubby doesn't appreciate rockets flying through space, don't despair, this collection is awesome on the flipside too.

beach+combing+%25281%2529JPG

I created this layout with a kraft cardstock and the backs of a couple of papers.
(This is a shameless copy of my own sandcastle wars layout)

A starfish charm is all it takes to make it beachy. The crackled letters are simply craft cardstock with Crackle Accents.

beach+combing+%25285%2529.JPG

To achieve this look, spread some texture past over any of the wonderful masks with a credit card (an old one, I would hope), let it dry, then place the mask over it again and spray with the glimmer mist of your choice.

beach+combing+%25282%2529.JPG

Find lots of yummy colours here!

I hope you enjoyed my bit of crazy fun with Kaisercraft and my2angels.

♥♥♥Geli♥♥♥

Saturday, June 1, 2013

New Kaisercraft Arrivals

New Kaisercraft Arrivals

These new collections from Kaisercraft are just the ticket to get my mojo back....

True Romance 

Get Romantic with this danty sweet with this love inspired collection.  True Romance is dreamy and light with soft colours


Miss Empire

 This collection incorporates mechanical  and industrial elements coupled with a madam and heritage inspired feel


and Blast Off!

3...2..1... Blast off! into scrapping with this cute "outer space" inspired range.  Vibrant colours jump off the page with cute alien planets and various other space related designs


Hi Ladies!

Michele here with a look at Kaisercraft's new Miss Empire Collection. 
I really like this one - the rich orange, mustard and brown colour palette (with teal green accents) is great for scrapping the boys as well as the girls, and the steam punk mix of roses, cogs, gears, machines and calculations means that you can tailor your layout to suit either.

For this layout I have taken advantage of the flowers and scrapped the girls, my DD and her friend dancing in a ballet school production of ''La Fille Mal Gardee'', a farmyard ballet in which they were two very cute hens.


I went pretty much back to basics with this layout...no sprays, mediums or complicated backgrounds, just a few simple techniques. Most of these double sided papers seem to have a masculine side and a feminine side, for example my Damask patterned base paper, 'Realm' has a teal green reverse with grungy cog pattern on it, and my next layer, 'Regent' has a reverse totally covered in roses.

 I punched two edges of this one with a simple scallop punch to soften the look just a little bit and to draw your eye to the corner where everything is going on. I also inked with Walnut Stain Distress Ink.
 The fussy cut frame with the swag of roses underneath and the paper it is sitting on are a part of one sheet of paper called 'Steampunk'. 

After I had cut out the frame I still loved the left over paper with it's grungy orange edges so decided to use it as a mat. I popped the frame up on dimensional tape so that my photo becomes the focus in a busy background.

Never being able to leave a plain background paper totally alone, I added a little bit of stamping. I used a small script stamp from my large collection of script stamps (*sigh* can you ever have enough script stamps?) and Kaisercrafts Botanical Clear Stamp with Emboss It Ink then embossed with gold.


Chipboard Tweeny Cogs and a Steam Punk Light Bulb from Twiddleybitz were also gold embossed and to continue the Steam punk theme I have added small cogs, gears and roses, and a larger oval element from the Miss Empire Die Cuts Collections pack. 

The lady on the right hand side of the frame, the tiny butterfly and some of the smaller fussy cut roses are from the 12 x 12 Sticker Sheet. 


Adding a very special touch underneath the photo is a my2angels Precious Memories Banner. This one is Rustic Brown. You can just see the shimmer of gold on this banner - it so perfectly matches these papers! So that it stands out nicely from the cluster of roses underneath it I made a chipboard secondary banner using some scraps of dark brown 'Dynasty' to offset it.


The matching button with it's dangling bird charm is in the top corner of the page along with another tag and label from the Collections pack, roses that were fussy cut from the 12 x 12 Sticker sheet, and a couple of cogs.
As you can see there are also lots of other flowers. Tiny Tangarine, Cream and Red roses, Tangarine Rose Buds, Tangarine Cherry Blossoms and a few Bronze oddments I had left over from Finn's classes. 


To finish off I have added some yellow rhinestones from my stash to the Precious Memories Banner, and scattered a few clear glass Cabochons in various sizes.

You'll enjoy Miss Empire - both for scrapping the girls and the boys...make sure you get to the store before I go back for more ;)

Michele