Showing posts with label Layout. Show all posts

Thursday, August 22, 2013

Sentimental Layout

Hi Everyone, Jennifer here with my latest layout.


I fell in love with these beautiful Framed Sentiment Embellishment that Tracy hand makes immediately and knew straight away how I wanted to use it and what photo to put with it!!


 It's no secret that I love Washi Tape (or Wasabi Tape as Tracy affectionally refers to it :-P) and i was super excited when she got these in so of course - they had to go on the layout too!


All products are available from Tracy - if not already in stock, please make a request and she'll do her best to get them in for you :-)

Here's a list of current my2angels stocked items I used for this layout.
Twiddleybitz Template - Bricks

Thanks for joining me!
Jennifer
:-)

Sunday, July 21, 2013

Viva Decor Modeling Creme is fantastic!

There are so many new and exciting products in the my2angels store at the moment! I want to use them all right now but there never seems to be enough time!!

This layout has it's fair share of new goodies though, starting with Kaiser's Enchanted Garden patterned papers. These are so pretty, definitely a collection for the girls. (I know you all have them since there seems to be nothing left in store!!!!).

Viva Decor Modeling Cream


Using a sheet of 'Fascinate' as my base I tried out my new Viva Decor Modeling Cremes in both Mother of Pearl Rose and Metallic Platin, pushing them through a stencil with an old store loyalty card to add a brocade pattern to the page. I used the two colours separately but didn't wait to dry between colours so where they touch they blend beautifully. You will need to get your stash of this product quickly before I go back to the store...I will be needing every colour Tracy has and probably more! I liked this effect so much that when it was dry I added a bit more, this time using glossy gel medium. The gel goes on white, so you can see what you are doing, but it dries clear leaving you with a subtle continuation of your pattern.

To add a bit more colour behind my photo, which is very plain, I sprayed very lightly with Vanilla Breeze and Sun Sisters Glimmermists, and stamped a few times with a script stamp (sorry, origin lost in the dim and distant past) and some Victorian Velvet Distress Ink.

To mat my photo I used two pieces of 'Entrance', slightly offset and then covered them both with a piece of white tulle to soften the darker colour a bit and add texture. The photo is placed on top of the tulle layer.

Viva Decor Modeling Cream

In between and on top of these layers I have tucked in a die cut from the Collections pack and few appropriate sentiments which came from the 12 x 12 Sticker Sheet. 

Taking centre stage at the top of the layout is a gorgeous Love you to Infinity Pink Charming Key Chain. I confess to adding a bit more Stampendous Shabby Pink Embossing Enamel to the key so that it looked as luscious as the chipboard word,  'love', and the chipboard flourish framing the photo. I love the way it looks up there in the corner, with the dangling end seeming to link the two sections of the layout together. Very happy with that!

Viva Decor Modeling Cream

Another gorgeous my2angels embellishment (and one that I've had in my stash since way before I became an angel myself) is the pink Memories pin tucked in behind my Pink Mini Gardenia. A little touch of Victorian Velvet around the edges and it blends in to this layout perfectly. 

Viva Decor Modeling Cream

I die cut some leaves from the same paper that I used as photo mats and added two shabby cream flowers from my stash. The other flowers in my clusters are my favourite Pink & White Cherry Blossoms, tiny Light Pink and White roses and some Pink and White Rose Buds. My two sweet fairies and the sparkling butterflies scattered around are fussy cut from the Enchanted Garden specialty paper 'Faries'. (Can't understand why Ngaire hasn't snapped this paper up yet...but glad I got a piece before she does...shhhh).
There is also a tiny chipboard heart in there - embossed to match of course, with Stampendous Shabby Pink.


Viva Decor Modeling Cream

Finally, I thought I'd try to take a photo showing how the clear Gel Medium and the gold flecks in the Stampendous Embossing powder pick up the light and shine....not a great photo, but I think it gives you an idea...a pretty, subtle sparkle on a pretty, girly page.

Viva Decor Modeling Cream

Pop over to the store with me and get yourselves some Viva Decor Modeling Creme...awesome stuff!

Michele xx

Monday, June 10, 2013

True Romance Double layout

Hi Ladies,

Ngaire here. 

I don't do doubles all that often - about as often as I do multi-photo layouts - so it makes a nice change to work on a multi-photo double layout. There has been a lot going on over the past few months and I've not had much time to scrap and I am doubly pleased to get something finally completed.

The range is one of the two new Kaiser ranges for June - True Romance - and it is a sweet and pretty range, just perfect for feminine, shabby chic style layouts. The dominant shades in the range are pale blues, greens and pink - with a slighter darker reddish pink for contrast. Themes in the range include some gorgeous pink roses; birds with their cages; and lots of lovely luggage tags. All very girly and pretty.

For the base of 'Cherish Life's Moments' I used the reverse side of the Affection paper - but I cut it out as a frame, so that I could use the smaller piece as well. Over this went a slightly smaller piece of the reverse side of Faithful and then over this went the cut-out bit of Affection. I really like the old-fashioned script you can see on this paper and being a background pattern, you can pile heaps of other things over it without missing out on anything really pretty.

I distressed all the paper edges and inked only the base paper. Rather than use other paper layers, to embellish the page I added a paper doily and some hand cut roses/tags. The larger of the two tags comes from the Desire patterned paper. The hand cut title letters on it are from the First Sight  paper.

The fussy nature of the hand cut flowers/doily make the layout look a little busy - so I kept other embellishments to a minimum.

IMG_5639

I love these filigree edges - the Twiddlybitz Wrought Iron Mantle - it's so easy to pop them alongside a photo to make an interesting border piece. This one has been inked with several layers of ink to get that lovely mottled pattern. The first layer was a mid-dark grey ink. Over that went a layer of white - but very sparingly - and then random bits of white ink dabbed here and there. You end up with a variety of greys and some white splotches - all very chic and shabby.

Over the top I popped some hand cut roses from the Adore paper and the daughter charm from the Daughter Pink Charming Rose Chain. I embossed the charm (and all the other bronze charms on the layout) with some Stampendous Aged Embossing Enamel Ivory - but I need to make a note not to do this again with the 'text' still inside the charm. :( Obviously the glue didn't like being heated - oh well, you learn as  you go.) The cream pearl is part of the Cream and Antique Bronze Keys Charming Chain set - I've used the rest elsewhere on the layout.

IMG_5634

In the top right-hand corner of the layout is the rest of the Daughter Pink Charming Rose Chain set. I've curled over a bit of the top paper edge and tucked some more hand cut flowers from the Adore paper underneath the edge - just to fill this empty bit of corner.

IMG_5638

I like to layer other embellishments on my chipboard pieces - here I've added some more hand cut flowers and the rest of the Cream and Antique Bronze Keys Charming Chain set- to the Twiddleybitz Eiffel Tower . Like the other chipboard pieces on the layout (the exception being the title) the Eiffel Tower has been given the grey/white inking treatment.
The Twiddleybitz chipboard title - Life's Moments - has been treated with Stampendous Aged Embossing Enamel Ivory embossing powder - which gives it a lovely creamy white colour with gold flecks through it.

IMG_5630

Underneath the photo I added in a Large Antique Bronze Key charm and one of the tag pieces from the Perforated Tags Sweetheart patterned paper.

IMG_5633

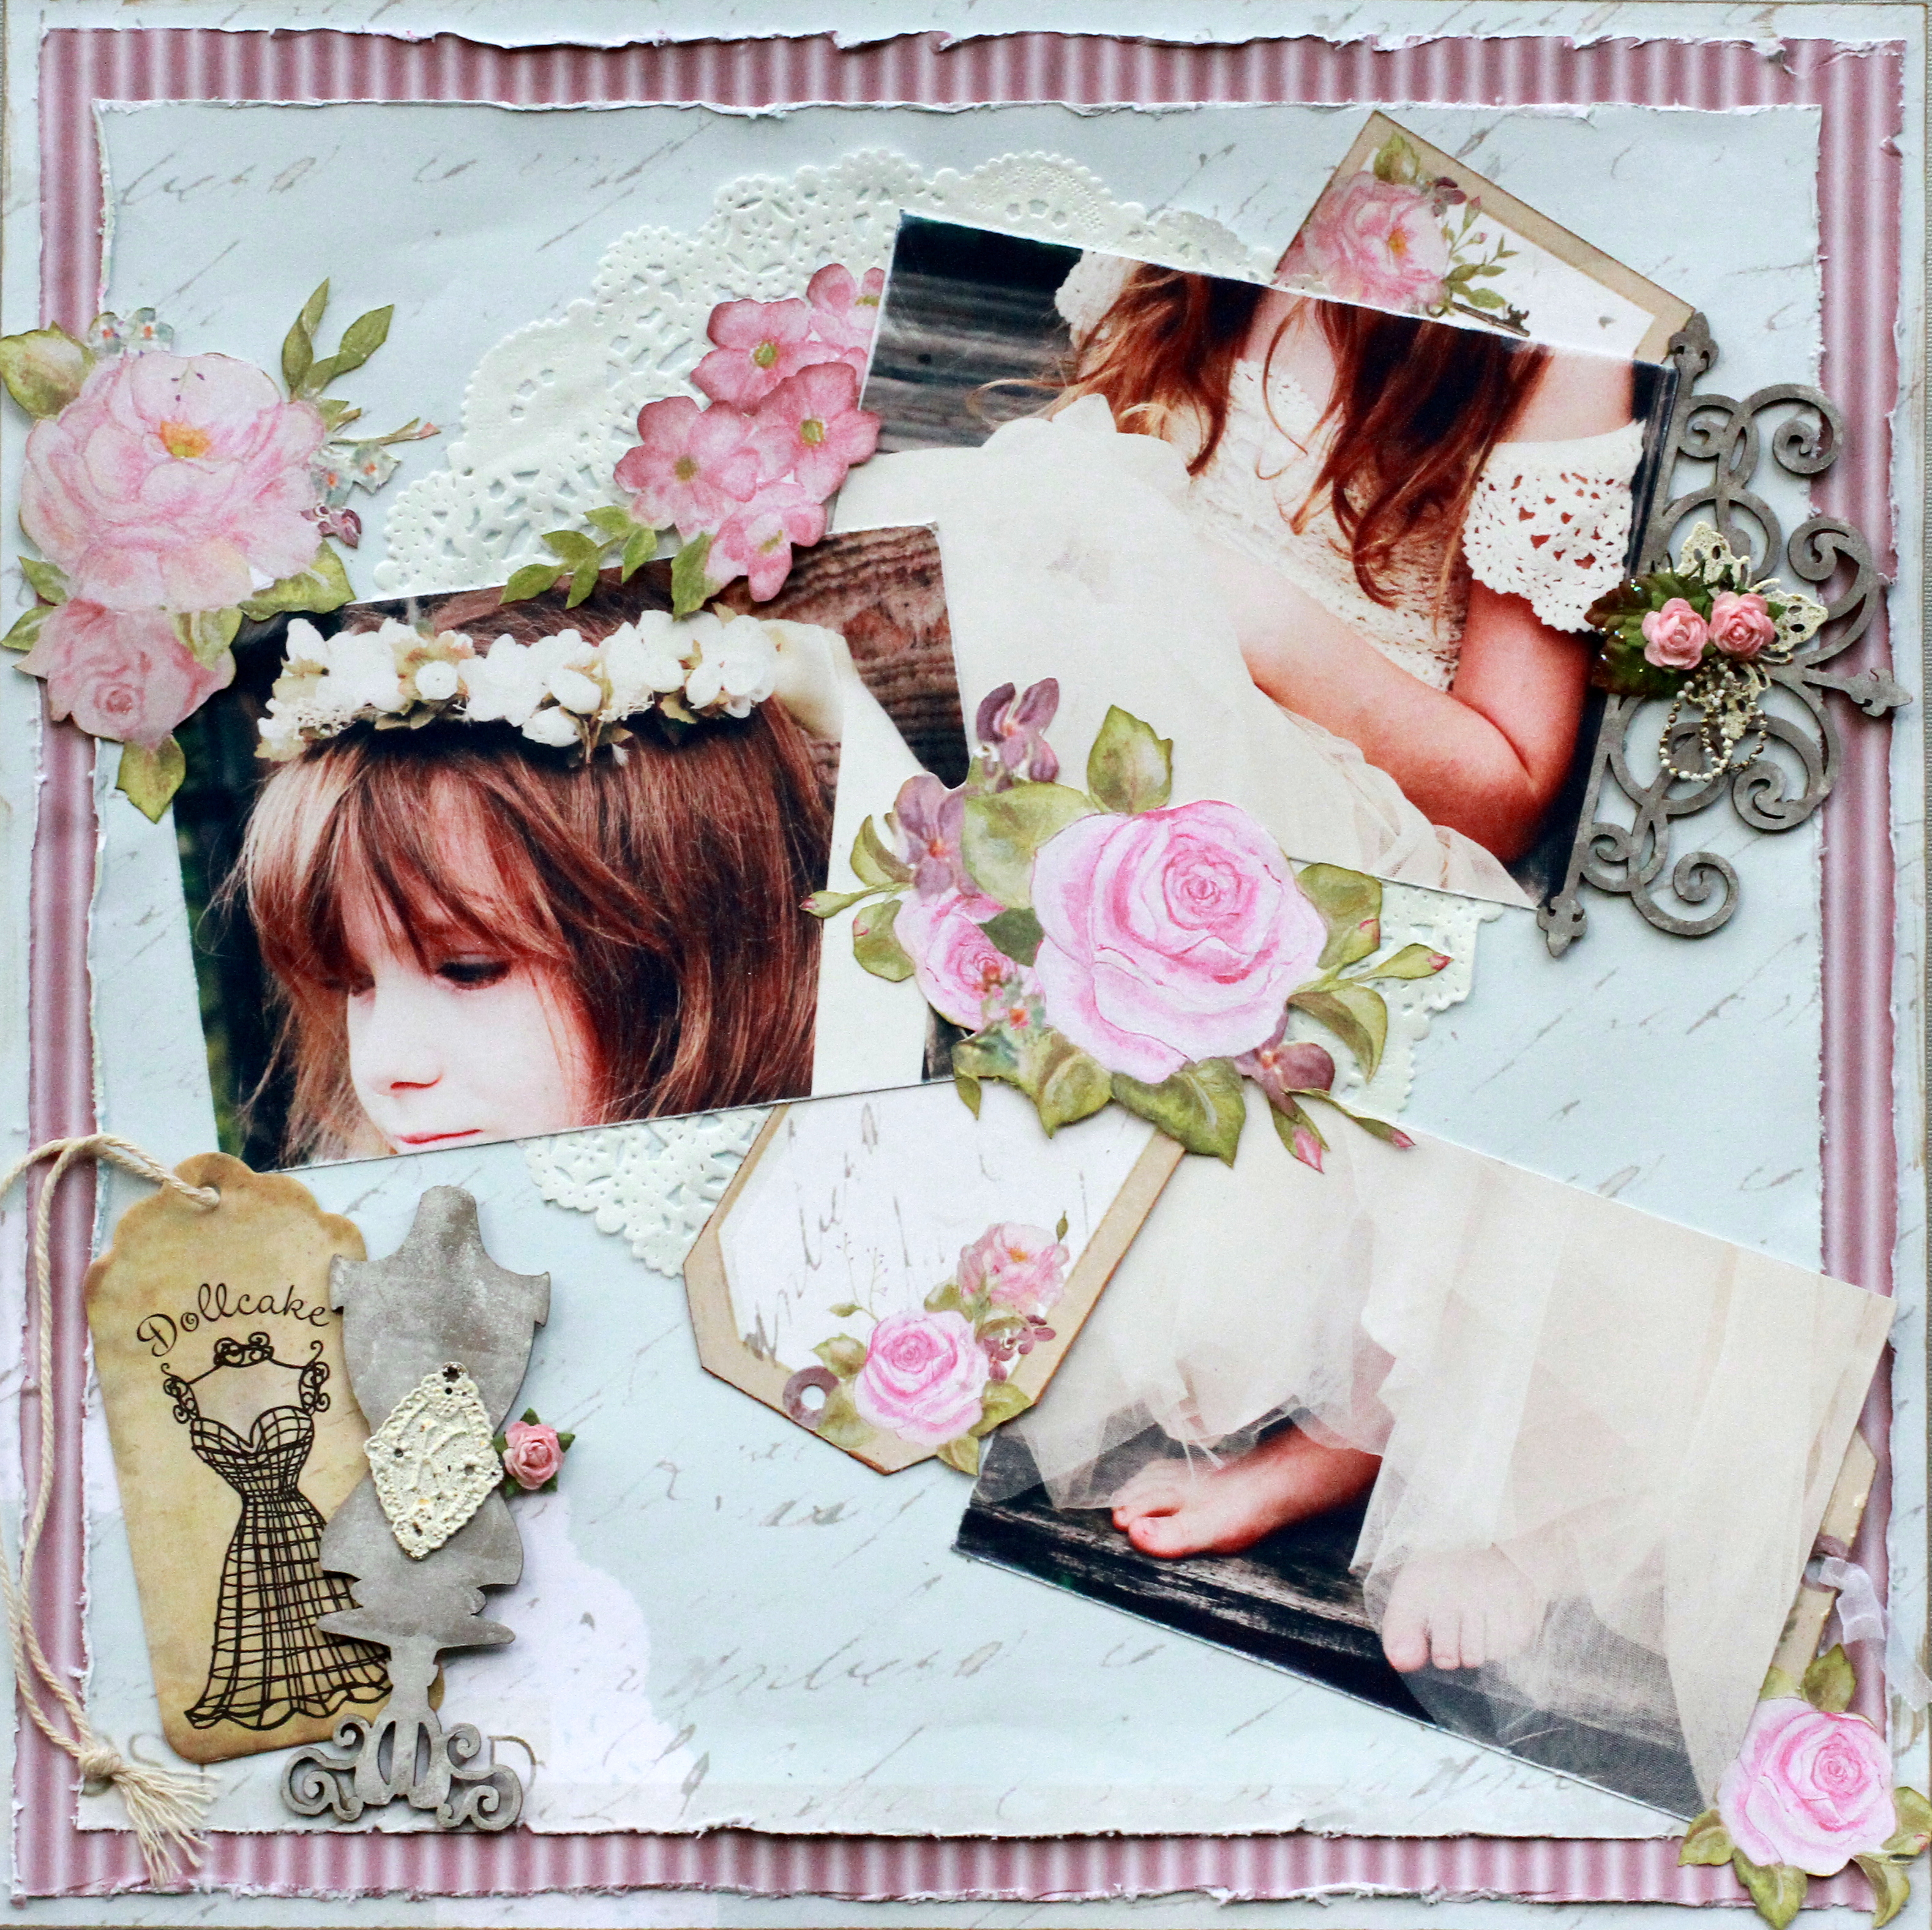
The second page of the double showcases Madame's (current) outfit. It's a very pretty, feminine tulle skirt and crocheted top from an Australian company called Dollcake.

I've used the same basic patterned paper arrangement as for the left side of the double and kept to roughly the same elements.

IMG_5628

The filigree work on this Twiddlybitz Wrought Iron Mantle is a nice match for the crochet work on the top. The top was the inspiration for using the doily as well. The roses and charm embellishment is one I made up myself from various left-overs. It came up rather nice I think - and I can see myself making a few more.

IMG_5621

All of the hand cut flowers come from the Adore paper and the two tags are again from the Perforated Tags Sweetheart patterned paper. I trimmed off the perforated bits and inked the edges to hide that they were once perforated.

IMG_5625

The final elements in the layout are the gorgeous tag that came with the skirt/top and in keeping with the dress theme - I added in one of the Twiddleybitz  Vintage Miss Mannequins. They come in a set of three - this is one of the plain designs. The "K" bronze charm is from my stash, but the rose next to it is one of the 'left-overs' I used to make my other embellishment.

IMG_5624

So there you have it - my first layout in several months - and a pretty feast of girly sweetness.

 Check out my2angels for the Twiddleybitz chipboard, True Romance papers and bronze charms I've used and have some fun making your own shabby chic creation.

Ngaire

Tuesday, September 8, 2009

I love you my son layout

I love you my son is the title for my take on the sketch challenge over at RSS this month. Here is the sketch


And here is my layout


I have used Three Bugs in a Rug Pattern Paper with white core dinations as the backing paper. Painted some corrugated cardboard with red metallic paint and inked it. Also our 100% boys ribbon for the bottom of the cardboard.


For my title I painted and inked chipboard letters then attached our love and bike charms


There are so many products out there using paperclips for scrapbooking, that I decided to make my own with our charms. To create the circles I punched out 2 circles, 1 larger circle using black core dinations cardstock for the backing and attached a paper clip to the back.
Core dinations is great to distress as it has an inner core colour which I emphasised by running my craft knife around the edges.
Then I downloaded an old newspaper, inked it and then attached the boys cap charm with Dimensional Magic. Black organza ribbon was used to tie the car charm to the paper clip. The arrow is from scrapware which I inked, dimensional magic and added one of our black rhinestones.


Bull dog clip, string (wiped with ink) and our little boy charms for the top corner of the photo
TFL and hope you all have a creative week
Tracy

Thursday, August 20, 2009

My favourite layout to date

I completed a layout yesterday and felt in the mood again to scrap today so I headed over to RSS to see what other challenges they had for the month. The colour challenge was everything I love ... flowers, rhinestones and chipboard then pink, blue and black to be used. And once I had the idea, a few hours later this is what I came up with


I can’t believe two layouts in 2 days, I am on a roll, hope I wanna do more tomorrow.

It wasn't an easy process getting the tulle to stick down so here is my layout at the beginning


Its there under the wood – still not completely stuck down but once in the album she’ll be right!


Here are a couple of close ups


It is my favourite photo of me with my mum, brother and sister taken a couple of years ago and to date this is now my favourite layout


This next layout took me about an 1 hour to make ... that was once I decided on how I was going to do it! I realised that I hadn’t even put my Happy Halloween ribbon on my website (real bad blonde moment) and I have 3 years of Halloween photos to scrapbook, so I started with last years ... the first year I dressed up as well ... to scare the crap out of the kids in our complex who came to the door ... it worked LOL especially as I turned off all the lights and just stuck my head around the door, wearing a mask, to greet them

It is quite a big thing in our complex. A week before hand everyone gets a note (usually organised by me) that they put on their door or window if they want the kids to visit their unit. This is so they aren’t annoying the boring farts who live here ;)
I swear the first year we were here the angels had enough lollies to last them until Christmas!

And so here is my layout using Making Memories Spellbound Pattern Papers with Nightfall and Orange Coredinations.


I have to admit I got the idea for the eyes on the scrapware tree from a blog I saw a while back, and I apologise in advance if it was your blog, I really must write down these important details to acknowledge the cleverness of others. The tree has been painted and inked


As always 99% of all products used you can get from my website.

Hope you like and a big thanks to everyone who visits and leaves me encouraging comments, it means sooooooooooo much to me


Tracy :)

Monday, April 27, 2009

Anzac Day Layout

Remember last week when I said the Scraplounge CC was on this weekend and you only had to complete 3 layouts, which I believe I said I think I can handle that!!! Yeah well I didn't and being a twit & not reading properly I was suppose to upload them last night - yeah good on me, I only finished the layout last night just before 24 started at 11pm!!!! But I sort of have a good excuse apart from the fact DS had footy and DD was in the Anzac Day Parade March, damm Bigpond decided not to work for a period of time over the weekend - so in effect my life ended partly over the weekend. Up to 2 days they inform me before it will be fixed - obviously they are too busy being I'VE BEEN EVERYWHERE MAN except Runaway Bay fixing my internet connection!!!! Thank god it was up and running on Sunday morning and then I had alot of work to catch up with.

Oh and then my computer decided not to acknowledge any of my printers, god knows why, they just weren't on the system, I can only assume they disappeared with all the lost socks that go astray in the washing machine!!!! I eventually got that problem sorted after a few hours but the mystery with the socks is still just that - a mystery!

Anyway thats my Monday bitch out of the way. Time for some scrapbooking.

Here's the layout I created for the cc which had to have an aged photo (well I kind of aged it by changing it to sepia tones), with lace, buttons, ribbons, journalling about your photo and earth tones.


I wasn't aware of this fact, but none of us living, have marched in the parade nor with my Grandmothers medals. As Sarah is in the school student council she was asked for represent the school. She wasn't too impressed carrying the framed photo of her Great Grandmother, but in her defence she wasn't really aware of the story behind it all until that morning, but eventually we convidence her and thanks to another mother who overheard us, told Sarah that is was an honor and priviledge. She actually created quite a bit of attention and had a few people requesting photos of her. So being the Drama Queen and with her "it's all about me" attitude I think she was glad she did in the end.

My grandmother was a nurse in Egypt and Italy - obviously I missed out on the caring genes. I am the one who laughs when there is an injury and the angels are not allowed to complain about being hurt unless bones & blood are visible!

Just a few close ups


The charms that I used, apart from the together tag charm, are usually silver however I just inked them with Stazon Timber Brown Ink and sprayed them with a matt finish to stop the ink from smudging. Got to finally use our glass beads as a strand. I have added blue into the layout cause the original photo has blue in it, which I was going to replace after I had submitted it to the CC. DS reckons I should leave it as is. I dunno not sure what I will do.
The little petite frame just above the photo of Sarah is one of the new charms which arrived on Friday. Whoops just realised I didn't let you all know about the new arrivals, here's a photo of some of them.


The soccer ball charms came in time, as Sarah has her first soccer game representing the school today. And that is where I am about to head off to.

Have a great day and don't forget the Treasure Hunt starts today at the Top 50 Scrapbooking Top50

Tracy

PS Here's a few photos for the rest of the family to view - you can look at them as well if you like, it just saves me from emailing them to everyone by posting them here:)