This is my last page for
my Russian album and it's ready to be mailed off. There are lots of
photos left, but they will go on a CD in a pocket at the end.
This last page has a
hidden photo, which is a great technique for private photos, or like in
my case, really goofy ones. Simply pull on the tag...
...and another photo swings out:
This sort of photo happens when you wait around at a tiny deserted train station in the Urals....
First, you will need 2
photos in the same size and direction. Create a mat under the main photo
to give your secret photo a place to hide. Mine is 3 1/2 x 9" and the
flower strip is 1 1/4 x 12". I just used some of the leftover papers.
The 2 photos are
attached at the top right corner (main photo) and the bottom right
corner (hidden photo). Here is how it will look from the back.
Punch a hole through both photos for a brad. The
brad needs to be fairly loose for maximum swinging action, so put 2
layers of scrap cardstock under the legs when you open them up and then
remove the cardstock:
Add a tag and you're ready to swing!
(I later sprayed the patterned paper with some white mist to tone down the colours a little)
Now on to the
background. This masking technique will work with any stamps you want to
layer in different colours. First stamp a few random tags. Stamp 2 more
on a post it note and cut them out carefully, just outside the edge.
They will be your masks.
Stick them over 2 of the tags on the background...
... and stamp over it
with a background stamp in a contrasting colour. There are many
wonderful background stamps to be found in the stamps section at my2angels and these distress inks work great for nice crisp images.
Peel the masks off and repeat all around the edge of the cardstock.
Now you can add your
photo mat, but be careful not to glue down the main photo on any part
where the hidden photo needs to swing out from. In my case it meant
leaving most of the left half of the photo and the mat glue-less.
Now embellish with some leftover stickers, a guitar charm...
Quick and easy. Why not give it a try sometime?
If you have missed the other 9 pages, here are the links:
part 5
and ....
Our street
Remember the days when
kids played on the street? When I was little, we lived on a very quiet
street and played there all the time. My kids aren't as lucky as we
live on a busy road, on the other side of the world.
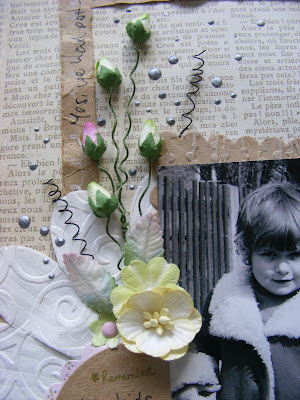
a giant white flower, which I embossed:
rose buds and cherry blossoms (both available in several colours), mini mulberry leaves (available in white) and the dots are made with Liquid Pearls:
(Yes, it's mini me again.)
A bit of scrunched up muslin and some dry embossing:
GELI


No comments:
Post a Comment